Power Chords for Beginners: Complete Practical Guide
Power Chords for Beginners: Complete Practical Guide: clear guitar guide with practical examples, common mistakes, and Chords.me practice tools.
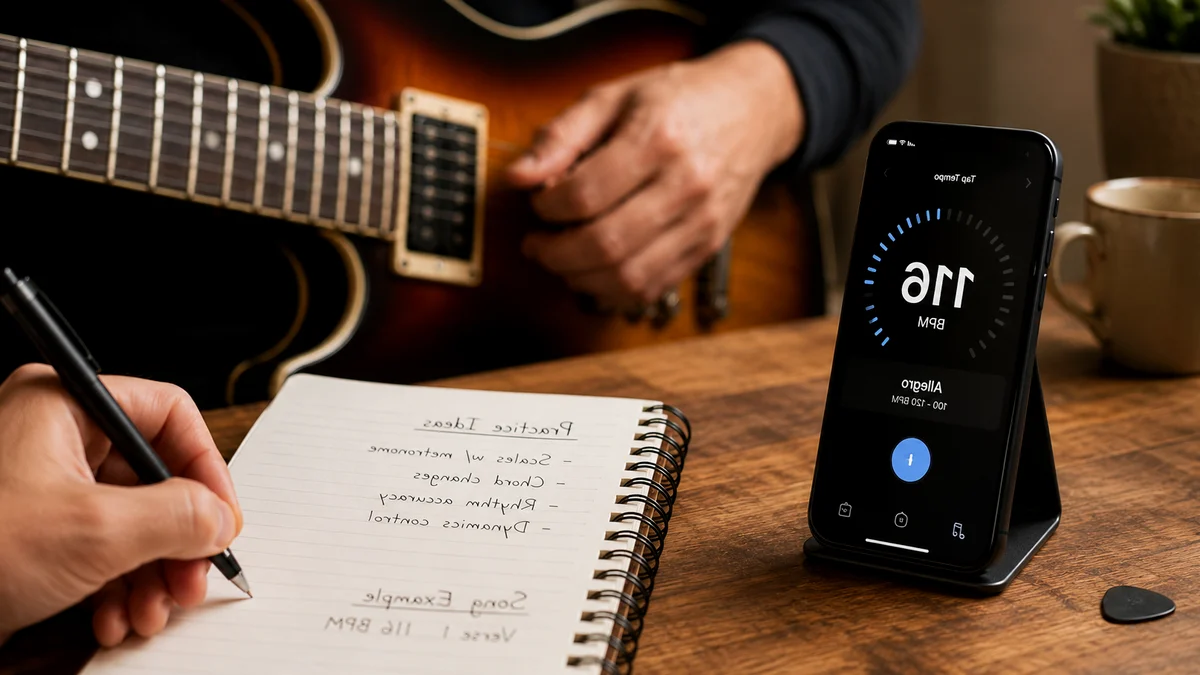
If you have ever picked up an electric guitar and wanted to play rock, punk, metal, or alternative music, you have heard power chords. They form the backbone of modern guitar music. Many of the most iconic riffs in music history—from Black Sabbath to Green Day—rely entirely on these simple, punchy chord shapes.
For a beginner, learning full open chords like C major or G major can be frustrating. Barre chords like F major can feel almost impossible at first. Power chords offer an elegant solution. They allow you to play real music quickly, build finger strength, and navigate the entire guitar fretboard without getting bogged down in complex fingerings.

What Is a Power Chord?
A power chord is a two- or three-note guitar chord consisting of a root note and its fifth interval. In music notation, it is written with the number 5 next to the root note (such as C5, G5, or A5). Because it lacks a third interval—the note that determines whether a chord sounds happy (major) or sad (minor)—a power chord has a neutral, powerful sound that is highly stable, especially when played with distortion.
Is Power Chords Good for Beginners?
Yes, power chords are excellent for beginners. In fact, they are often the first shapes guitar teachers introduce when transitioning students from acoustic strumming to electric guitar riffs.
There are three main reasons why power chords are ideal for those starting out:
- Universal Shape: Once you learn one basic power chord shape, you can play dozens of different chords simply by sliding that exact same hand position up and down the neck.
- Physical Accessibility: They do not require the intense finger flexibility or hand strength of traditional barre chords.
- High Reward: You can learn to play hundreds of famous rock and pop songs within your first few days of practicing them.
What Is a Power Chord? (The Music Theory Made Simple)
To understand why power chords guitar players love these shapes so much, we need to look briefly at how chords are built.
Traditional chords, like a standard C major, are triads. This means they contain three distinct notes:
- The Root (1st): The foundational note that gives the chord its name (C).
- The Third (3rd): The note that decides the tonality. A major third makes the chord sound happy; a minor third makes it sound sad.
- The Fifth (5th): The note that supports and stabilizes the root.
A power chord strips away the third. It contains only the Root and the Fifth.
Because there is no third, a C5 chord is neither major nor minor. It is tonally ambiguous. You can play a C5 power chord over a song in C major or C minor, and it will sound perfectly in tune.
This neutrality is incredibly useful when using distortion or overdrive on an amplifier. Distortion multiplies the harmonic frequencies of notes. When you play a standard major or minor chord with heavy distortion, the third interval often clashes with these harmonics, creating a muddy, harsh sound. Stripping the chord down to just the root and the fifth creates a clean, focused, and powerful sound that cuts through a band mix.
How to Learn Power Chords Step by Step
Learning how to play power chords correctly requires attention to hand posture, finger placement, and string muting. Follow this step-by-step guide to build a clean, buzz-free power chord shape.
Step 1: Find the Root Note
Every power chord is defined by its lowest note, which is the root note. For beginners, we start on the low E string (the 6th string). Let us find a G5 power chord. Locate the 3rd fret on the low E string. This note is G.
Step 2: Place Your Index Finger
Place the tip of your index finger (Finger 1) on the 3rd fret of the low E string. Position your finger just behind the fret wire, not directly on top of it and not too far back. Press down firmly with the pad of your finger, keeping your knuckle slightly bent.
Step 3: Place Your Ring Finger
Next, locate the 5th fret on the A string (the 5th string). Place your ring finger (Finger 3) on this note. This note is D, which is the perfect fifth of G.
At this point, you have a basic two-string G5 power chord.
Step 4: The Secret of Muting
If you strum all six strings right now, it will sound terrible. You only want to hear the 6th and 5th strings. This is where muting becomes essential.
- The Index Finger Pad: Let the fleshy underside of your index finger rest lightly across the remaining strings (D, G, B, and high E) without pressing them down to the frets. This prevents them from ringing out if your pick accidentally hits them.
- The Tip of the Index Finger: You can also use the very tip of your index finger to touch the side of the string directly above it (if you are playing a chord rooted on the A string) to mute unwanted low-string noise.
Step 5: Add the Octave (The Three-String Shape)
Once you are comfortable with the two-string version, you can add a third note to make the chord sound fuller. This note is the octave of the root. Place your pinky finger (Finger 4) on the 5th fret of the D string (the 4th string). This note is another G, one octave higher than your root note.
Now you are fretting:
- 6th string, 3rd fret (Root)
- 5th string, 5th fret (5th)
- 4th string, 5th fret (Octave)
Strum only these three strings. You now have a full, classic three-string power chord.
Essential Power Chord Shapes on the Guitar Fretboard
To navigate the guitar fretboard effectively, you must learn where to place these shapes. There are three primary locations for power chords: those rooted on the 6th (E) string, those rooted on the 5th (A) string, and those rooted on the 4th (D) string.
1. The 6th String Root Shape
This is the most common power chord shape. The root note is always on the low E string.
- F5: Root on the 1st fret of the E string.
- G5: Root on the 3rd fret of the E string.
- A5: Root on the 5th fret of the E string.
- B5: Root on the 7th fret of the E string.
Because the physical distance between frets is wider near the headstock of the guitar, playing an F5 or G5 will require a slightly wider finger stretch than playing a B5 or C5 further up the neck.
2. The 5th String Root Shape
To play a power chord rooted on the A string, you shift the entire finger shape down by one string toward the floor. The shape remains identical, but your root note is now on the 5th string.
- C5: Root on the 3rd fret of the A string.
- D5: Root on the 5th fret of the A string.
- E5: Root on the 7th fret of the A string.
When playing these chords, it is vital to mute the low E string. You can do this by letting the very tip of your index finger rest lightly against the side of the low E string.
3. The 4th String Root Shape
You can also play power chords rooted on the D string (the 4th string).
- G5 (High): Root on the 5th fret of the D string.
- A5 (High): Root on the 7th fret of the D string.
Note on tuning geometry: If you try to move this same shape down to the 3rd string (G string), you have to adjust your fingering. Because of the way the guitar is tuned, the interval between the G and B strings is a major third, not a perfect fourth. To play a power chord rooted on the G string, you must slide your ring finger up by one extra fret. For beginners, it is best to stick to the 6th and 5th string shapes first.
4. Open Power Chords
You do not always need to use your index finger to fret the root note. If the root note of your chord is an open string (E, A, or D), you can play an open power chord.
- Open E5: Play the open 6th string (E) and place your index finger on the 2nd fret of the 5th string (B).
- Open A5: Play the open 5th string (A) and place your index finger on the 2nd fret of the 4th string (E).
- Open D5: Play the open 4th string (D) and place your index finger on the 2nd fret of the 3rd string (A).
These open shapes are incredibly resonant and are heavily used in classic rock and metal rhythm playing.
Power Chords Mistakes Beginners Make (And How to Fix Them)
While power chords are simpler than open chords, beginners frequently encounter a few common physical hurdles. Understanding these power chords mistakes beginners make will help you avoid bad habits early on.
1. The "Death Grip" (Squeezing Too Hard)
Many beginners squeeze the neck of the guitar as hard as they can, using their thumb as a clamp against the back of the neck. This leads to rapid hand fatigue, cramping, and can actually pull the notes sharp, making your chords sound out of tune.
- The Fix: Use the weight of your arm to pull back slightly against the fretboard, rather than relying solely on thumb pressure. Press only hard enough to make the note ring clearly.
2. Failing to Mute Unused Strings
If you do not mute the unused strings, your power chords will sound muddy and chaotic. Any slight movement of your hand can cause the open G, B, or high E strings to ring out.
- The Fix: Keep your index finger flat and relaxed across the higher strings. It should act like a soft dampening pad, preventing those strings from vibrating.
3. Collapsing the Knuckles
If your fingers lay completely flat across the fretboard like a bar, you might accidentally mute the strings you actually want to hear.
- The Fix: Ensure your ring and pinky fingers are arched at the knuckles. They should contact the strings with their tips, not the flat pads of the fingers.
4. Incorrect Thumb Placement
If your thumb is wrapping over the top of the neck, it limits the reach of your fingers, making the stretch between frets much harder.
- The Fix: Place your thumb on the middle of the back of the neck, roughly opposite your middle finger. This opens up your hand and gives your fingers more reach and flexibility.
| Chord Shape | Finger Position | Common Problem | Easier Option |
|---|---|---|---|
| Two-String Power Chord | Index on Root, Ring on 5th | Unintentional open strings ringing out | Use the underside of your index finger to mute higher strings |
| Three-String Power Chord | Index on Root, Ring on 5th, Pinky on Octave | Pinky collapsing or buzzing on the fret | Stick to the two-string version until hand strength improves |
| Open Power Chord (E5/A5) | Open string root, Index on 2nd fret | Striking the wrong strings with the pick | Focus your strumming hand on hitting only the top two or three strings |

How Do You Use Power Chords in Real Music?
Once you have memorized the basic guitar chord shapes, the next step is learning how to use power chords in real musical scenarios.
Simplifying Difficult Progressions
One of the best practical applications of power chords is simplifying complex songs. If you are trying to learn a song that features difficult barre chords like F# minor, B minor, or C# major, you can substitute them with power chords.
You can play: G5 — B5 — C5 — D5
The song will retain its drive, structure, and recognizable melody, but will be significantly easier to play.
If you want to change the key of a song to make it easier to sing or play, tools like the Chords.me Chord Transposer are incredibly helpful. You can input a complex chord progression, transpose it to a friendlier key, and then apply your power chord shapes to the new progression.
Navigating the Fretboard
To use power chords fluidly, you must memorize the notes on the low E and A strings. This allows you to locate any power chord instantly. Here is a quick reference guide for the first 12 frets:
- Fret 0: E (Open)
- Fret 1: F
- Fret 3: G
- Fret 5: A
- Fret 7: B
- Fret 8: C
- Fret 10: D
- Fret 12: E
A String (5th String) Notes:
- Fret 0: A (Open)
- Fret 2: B
- Fret 3: C
- Fret 5: D
- Fret 7: E
- Fret 8: F
- Fret 10: G
- Fret 12: A
If a song sheet asks for a D5 chord, you have two excellent options:
- Play it on the 5th string, 5th fret.
- Play it on the 6th string, 10th fret.
Using the 5th string option is usually easier because it keeps your hand closer to the headstock where the frets are wider and more comfortable to navigate.
Rhythm Techniques for Power Chords
Playing the right shapes is only half the battle; how you strike the strings determines your overall sound. Power chords require specific right-hand (strumming hand) techniques to sound tight and professional.
All-Downstroke Strumming
In rock and punk music, rhythm guitarists rarely use alternating (up and down) strumming for power chords. Instead, they use continuous downstrokes. Downstrokes provide a heavier, more aggressive attack and ensure that the lowest note (the root) is always hit first and hardest. Think of bands like Ramones or Metallica; their driving sound comes almost entirely from fast, consistent downstrokes.
Palm Muting
Palm muting is a fundamental technique used to control the sustain of your power chords. It creates a chunky, percussive sound.
- How to do it: Place the outer edge of your strumming hand (the fleshy part of your palm near your pinky) lightly on the strings, right where they meet the bridge of the guitar.
- The Result: When you strum, the strings will still ring with a clear pitch, but they will be heavily dampened, producing a tight, rhythmic chug.
By alternating between open, ringing power chords and tight, palm-muted strokes, you can create dynamic contrast in your rhythm playing.
Practical Chord Progressions to Practice Today
The best way to master power chords is to play them in context. Here are three classic chord progressions made to build your fretboard navigation, speed, and precision.
Progression 1: The Punk Rock Anthem
This progression uses four basic chords rooted on both the 6th and 5th strings. It teaches you how to transition smoothly between strings.
- Chords:
G5 — C5 — D5 — C5 - Locations:
- G5: 6th string, 3rd fret
- C5: 5th string, 3rd fret
- D5: 5th string, 5th fret
- C5: 5th string, 3rd fret
- Practice Tip: Keep your hand in the power chord shape as you move. Slide your fingers directly down from the 6th string to the 5th string to hit the C5, then slide that same shape up two frets to hit the D5.
Progression 2: The Grunge Descending Pattern
This progression moves horizontally along the neck, helping you practice sliding your hand while maintaining consistent finger spacing.
- Chords:
A5 — G5 — F5 — G5 - Locations:
- A5: 6th string, 5th fret
- G5: 6th string, 3rd fret
- F5: 6th string, 1st fret
- G5: 6th string, 3rd fret
- Practice Tip: Do not lift your fingers completely off the strings when shifting frets. Lighten your pressure slightly so your fingers slide smoothly along the strings, then press down firmly once you reach the target fret. This keeps your hand stable and reduces transition time.
Progression 3: The Classic Rock Mix
This progression combines open power chords with fretted power chords, a common technique in classic rock.
- Chords:
E5 (Open) — G5 — A5 (Open) — C5 - Locations:
- E5: Open 6th string, 2nd fret on the 5th string
- G5: 6th string, 3rd fret
- A5: Open 5th string, 2nd fret on the 4th string
- C5: 5th string, 3rd fret
- Practice Tip: Pay close attention to your strumming hand here. When playing the open E5, ensure you do not strike the open A string. When playing the open A5, make sure to avoid the low E string entirely.
Moving Forward with your guitar learning
Mastering power chords is a significant milestone for any beginner guitarist. They open up a strong library of music and provide a solid foundation for more advanced techniques, such as full barre chords and soloing.
As you practice, focus on keeping your transitions smooth and your muting clean. Use online tools like the Chords.me chord sheets, tuner, and transposer to help you find new songs, keep your instrument in perfect pitch, and adjust keys to fit your playing level. With consistent daily practice, these shapes will soon feel like second nature, allowing you to play your favorite songs with confidence and power.
Related Chords.me Guides
For the next step, read CAGED System Guitar Explained: Complete Beginner’s Guide to Fretboard Mast, Pentatonic Scale Guitar Guide: Complete Beginner Guide, and Major vs Minor Keys: Guitar Guide before moving on. You can also test the same idea in another key and keep practice timing steady with the tap tempo tool while practicing this lesson.
Practice This With Chords.me
Use the Chord Transposer to test the idea in another key, then practice the same example slowly. Focus on clean notes and steady timing before increasing speed.
Frequently Asked Questions
What is Power Chords?
Power Chords is a guitar-learning topic that helps players build a clearer connection between technique, sound, and practice. For beginners, the most useful approach is to learn the basic idea first, then apply it slowly on a tuned guitar.
Is power chords hard for beginners?
It can feel difficult at first, but it becomes manageable when you break it into small steps. Focus on clean notes, relaxed hands, and short practice sessions instead of trying to master everything in one day.
What should I practice first for power chords?
Start with the simplest version of the idea: one chord, one pattern, one short exercise, or one small section of the fretboard. Once that feels stable, add timing, transitions, or a second example.
What common mistakes should I avoid?
Avoid rushing, pressing harder than necessary, ignoring tuning, and practicing mistakes at full speed. Slow, accurate repetitions usually fix beginner problems faster than long unfocused practice sessions.
Which Chords.me tool helps with this topic?
The Tap Tempo is the best supporting tool here because it helps with keeping rhythm steady and checking practice tempo. Use it before or during practice so the article’s examples translate into real playing more easily.
About the Contributor
Chords.me Guitar Theory Desk Chord, scale, and fretboard contributor
A brand contributor profile for Chords.me theory articles. This desk focuses on chords, scales, keys, fretboard patterns, and practical examples that connect music theory to real guitar playing. Content is checked for practical clarity, beginner readability, and accurate links to relevant Chords.me tools.