How to Play Guitar Chords Cleanly
Learn how to play guitar chords cleanly by fixing muted strings, finger angle, pressure, and slow practice habits.
Every beginner guitarist experiences the same frustrating moment: you press your fingers onto the strings, sweep your pick across the guitar fretboard, and instead of a beautiful, ringing harmony, you hear a dull thud or a metallic buzz.
Learning how to play guitar chords is one of the first major milestones in your musical learning process. However, getting those chords to sound clear, resonant, and completely free of unwanted noise requires a mix of proper hand posture, finger placement, and muscle control.

Below is a quick, actionable checklist to get your chords sounding pristine right away.
How to Play Guitar Chords Cleanly: The 5-Step Checklist
- Position your fingers close to the fret wire: Place your fingertips just behind the metal fret wire, not directly on top of it and not too far back toward the headstock.
- Arch your knuckles: Keep your fingers curved like claws so they stand straight up from the fretboard, preventing them from leaning on adjacent strings.
- Use the very tips of your fingers: Press down using the firm flesh at the very top of your fingertips, keeping your fingernails trimmed short.
- Keep your thumb low and centered: Position your thumb on the back of the neck, roughly opposite your index or middle finger, to act as an anchor.
- Apply only the necessary pressure: Press just hard enough to make the note ring clearly; squeezing too hard causes hand fatigue and pulls the notes out of tune.
The Mechanics of the Guitar Fretboard
To understand how to play guitar chords cleanly, you must first understand the physics of your instrument. When you press a string down, you are shortening its vibrating length. The string vibrates from the bridge of the guitar to the specific metal fret wire you are pressing behind.
If your finger is placed too far back from the fret wire, the string will not make solid contact with the metal. This results in a buzzy, weak sound because the string is rattling against the fret. Conversely, if you place your finger directly on top of the fret wire, you damp the vibration entirely, producing a dead note. The sweet spot is always just a millimeter or two behind the fret wire.
Your hand posture dictates how easily you can reach these sweet spots. Think of your fretting hand as a claw. Each finger joint needs to be bent, forming a series of arches. If any of your knuckles collapse or flatten out, the soft underside of your finger will inevitably touch the neighboring strings, muting them.
The thumb plays a critical supporting role. Many beginners wrap their thumb over the top of the neck. While this grip is useful later for bending strings or playing certain blues styles, it restricts your finger reach and flattens your knuckles. For clean, open beginner guitar chords, keep your thumb centered on the back of the neck. This lowers your hand, giving your fingers the clearance they need to arch over the strings.
How to Learn How to Play Guitar Chords Step by Step
Learning how to play guitar chords for beginners does not have to be a guessing game. By breaking the process down into systematic steps, you can build clean habits from day one.
Step 1: Read and Visualize the Chord Diagram
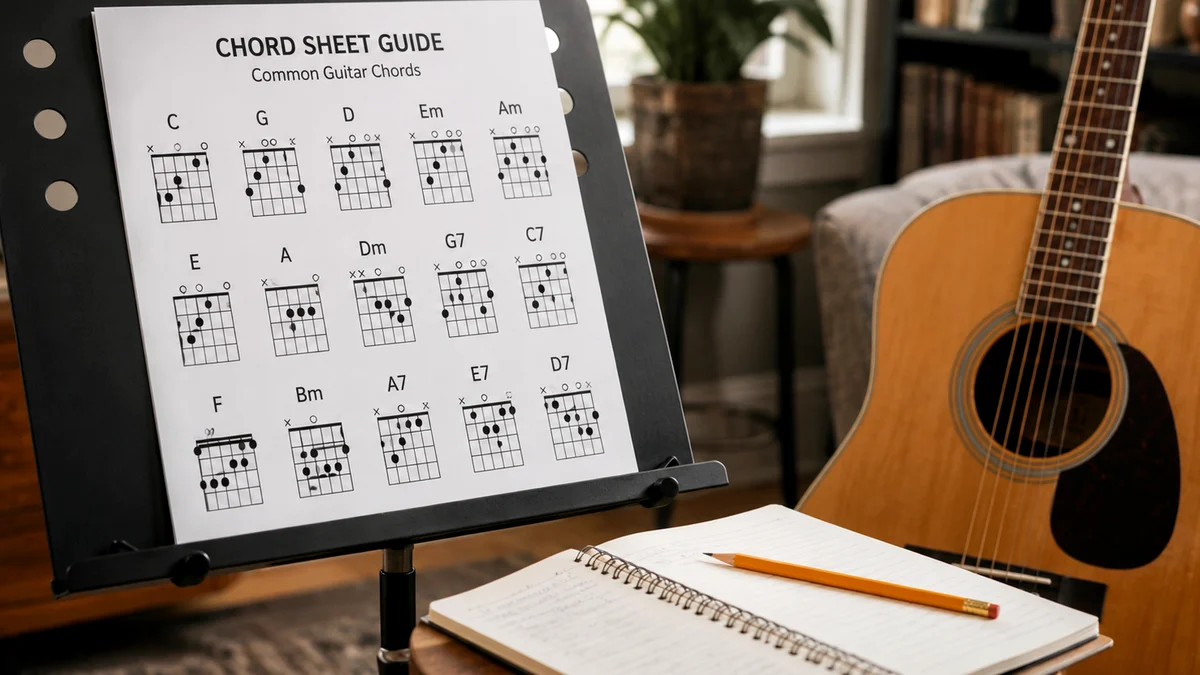
Before placing your fingers on the guitar fretboard, look at a chord diagram. A chord diagram is a visual map of the fretboard. The vertical lines represent the strings (from left to right: E, A, D, G, B, e), and the horizontal lines represent the frets. The dots show you exactly where to place your fingers, with numbers indicating which fretting finger to use:
- 1 = Index finger
- 2 = Middle finger
- 3 = Ring finger
- 4 = Pinky finger
An "X" at the top of a string means you should not play or strike that string. An "O" means the string is played open, without any fingers pressing down on it.
Step 2: Build the Chord from the Root Note Up
Do not try to drop all your fingers onto the fretboard at the exact same millisecond. When learning a new shape, find the root note first. The root note is the foundational pitch that gives the chord its name (for example, the C note in a C major chord).
Place the finger responsible for the root note first, then position your remaining fingers one by one. Building the chord from the lowest-pitched string to the highest-pitched string helps your brain map the physical layout of the shape systematically.
Step 3: Perform the "Pluck Test"
Once your fingers are in position, do not just strum the whole chord. Strumming hides individual mistakes. Instead, play each string one at a time, slowly, from the lowest string to the highest.
Listen closely to each note:
- Is it ringing out clearly? Move to the next string.
- Is it buzzing? Adjust your finger closer to the fret wire.
- Is it completely dead or muted? Look closely to see if an adjacent finger is leaning against it, or if you need to press slightly harder.
Adjust your hand until every single string in the chord shape rings out beautifully. This diagnostic exercise is the single most effective way to train your hands for clean playing.
Step 4: Find the Minimum Pressure Point
Beginners often press down with maximum force, believing that squeezing harder will make the notes cleaner. This is a mistake. Squeezing too hard causes hand cramps, slows down your chord changes, and actually pulls your guitar out of tune by stretching the strings too far down into the fret gaps.
To find the correct pressure, place your fingers in a chord shape without pressing down at all—just rest them on top of the strings. Start strumming or plucking the strings while slowly, gradually increasing pressure. The moment the notes stop buzzing and start ringing clearly, stop pressing. That is your minimum pressure point. Try to memorize how little force it actually takes to get a clean sound.
Essential Beginner Guitar Chords and Common Adjustments
To put these steps into practice, let us look at five essential beginner guitar chords. Each of these shapes introduces a unique physical challenge for your hand.
| Chord Shape | Finger Position | Common Problem | Easier Option / Adjustment |
|---|---|---|---|
| C Major | Ring on 5th string (3rd fret), Middle on 4th string (2nd fret), Index on 2nd string (1st fret). | The open 3rd (G) string gets muted by the underside of the middle finger. | Arch the middle finger knuckle significantly; keep the wrist dropped. |
| G Major (4-finger) | Middle on 6th string (3rd fret), Index on 5th string (2nd fret), Ring on 2nd string (3rd fret), Pinky on 1st string (3rd fret). | The 5th string is muted by the middle finger, or the pinky feels too weak to press cleanly. | Try the 3-finger version (using Ring on 1st string and leaving 2nd string open) to reduce stretch. |
| D Major | Index on 3rd string (2nd fret), Ring on 2nd string (3rd fret), Middle on 1st string (2nd fret). | The open 4th (D) string is accidentally muted, or the high E string buzzes. | Ensure the ring finger is pressed right up against the 3rd fret wire. Keep the thumb low. |
| A Minor | Middle on 4th string (2nd fret), Ring on 3rd string (2nd fret), Index on 2nd string (1st fret). | Fingers bunch together, pushing the ring finger too far back from the fret wire. | Angle your knuckles slightly toward the headstock to fit all three fingers in the narrow fret space. |
| E Minor | Middle on 5th string (2nd fret), Ring on 4th string (2nd fret). | The open 3rd, 2nd, and 1st strings get muted by a drooping fretting hand. | Push your wrist forward slightly to create a natural arch over the high strings. |
Troubleshooting the Open Strings
Open strings are the practical detail beauty of beginner guitar chords, but they are also the most vulnerable to accidental muting. When playing a C major chord, the open G string sits directly underneath your middle finger, which is fretting the D string. If your middle finger is even slightly flat, it will rest on the G string, deadening it.
To fix this, focus on the angle of your fingers. Your fingertips should meet the fretboard at a clean 90-degree angle. If you look at your fretting hand and see your fingers slanting diagonally across the strings, adjust your wrist position. Bringing your wrist slightly forward under the neck will naturally force your fingers to arch upward and clear the open strings.

What Mistakes Should Beginners Avoid with How to Play Guitar Chords?
When learning how to play guitar chords mistakes beginners make are incredibly common, but they can quickly turn into bad habits if left unchecked. Recognizing these issues early will save you months of frustration.
Long Fingernails on the Fretting Hand
This is a purely physical limitation. If the fingernails on your fretting hand are too long, they will hit the wood of the fretboard before your fingertips can make solid contact with the strings. This forces your fingers to flatten out, which guarantees muted strings and buzzing. Keep the nails on your fretting hand trimmed short enough that you can press your fingertips flat against a table without your nails touching the surface.
The "Death Grip" and Hand Tension
It is natural to tense up when you are trying to do something difficult, but tension is the enemy of clean guitar playing. Squeezing the neck like a baseball bat restricts your mobility and causes rapid fatigue.
If your hand starts to cramp or hurt, stop playing immediately. Shake your hand out, stretch your fingers, and take a deep breath. Practice playing the chord shapes with a relaxed hand, focusing on using the weight of your arm to help pull the strings down rather than relying solely on thumb-and-finger pinching power.
Ignoring the Angle of the Wrist
Your wrist acts as the steering wheel for your fretting hand. If your wrist is bent at an extreme, unnatural angle, you run the risk of developing repetitive strain injuries like carpal tunnel syndrome. Keep your wrist relatively straight and relaxed. If you find yourself struggling to reach a chord shape, try adjusting the angle of the guitar neck itself. Tilting the neck upward toward a 45-degree angle makes it much easier for your fretting hand to access the fretboard cleanly.
Developing Muscle Memory and Clean Transitions
Getting a single chord to sound clean while sitting still is a great first step, but music happens in motion. To play songs, you must be able to transition from one chord shape to another smoothly and cleanly without losing your rhythm.
Use Anchor Fingers
Many common chord progressions share common notes or finger placements. When changing chords, look for "anchor fingers"—fingers that do not need to leave the fretboard during the transition.
For example, when moving from a C major chord to an A minor chord, your index finger on the 2nd string and your middle finger on the 4th string stay in place. Only your ring finger moves. By keeping those anchor fingers planted, you keep a physical reference point on the fretboard and make the transition faster.
C major to A minor anchor-finger move

String:      E   A   D   G   B   e
C major:     x   3   2   0   1   0
A minor:     x   0   2   2   1   0
Anchor:              2       1
Move:            3   →   3

Keep finger 1 on the B string 1st fret.
Keep finger 2 on the D string 2nd fret.
Move finger 3 from A string 3rd fret to G string 2nd fret.
This small movement is easier than lifting the whole hand. Practice it slowly: form C major, pluck every string, move only the ring finger, then pluck A minor. If either chord buzzes, pause and fix the finger angle before increasing speed.
The "Hover" Exercise
To build muscle memory for entire chord shapes, try the hover exercise. Form a chord shape cleanly on the fretboard. Once all notes ring out perfectly, lift your fingers slightly off the strings—just a few millimeters—while keeping them in the exact shape of the chord.
Hold that shape in the air for a few seconds, then press your fingers back down onto the strings simultaneously. Repeat this lifting and pressing motion. This exercise trains your brain to recognize the chord shape as a single physical unit rather than a collection of individual finger movements.
Organizing Your Practice
When you are practicing chord progressions, it is incredibly helpful to have clean, readable charts to follow. Using tools like the Chords.me Chord Sheet PDF Generator allows you to create customized, uncluttered chord sheets for the songs you are working on. Having a clear visual layout of your chord progression prevents you from losing your place, allowing you to focus 100% of your mental energy on your hand posture and finger placement.
How Long Does It Take to Learn How to Play Guitar Chords?
One of the most common questions beginner guitarists ask is: How long does it take to learn how to play guitar chords cleanly?
The honest answer depends entirely on your practice consistency, but here is a realistic timeline for most dedicated beginners practicing 15 to 30 minutes a day:
- Week 1 to 2: Your fingertips will feel tender, and your chords will likely sound buzzy or muted. This is completely normal. Your body is adapting to a brand-new physical skill.
- Week 3 to 4: You will begin to develop calluses on your fingertips. This hardened skin makes pressing the strings down significantly easier and less painful. You will start to get clean sounds out of basic shapes like E minor and A minor.
- Month 1 to 2: Muscle memory begins to take hold. You will be able to form shapes like C major and G major without looking at your hands as much. Chord transitions will start to feel smoother, though there may still be brief pauses between changes.
- Month 3 and beyond: Your hand strength and flexibility will have improved dramatically. You will be able to play through simple chord progressions in real-time along with a metronome or a backing track, with minimal buzzing or muted strings.
Remember that progress on the guitar is not a straight line. Some days your fingers will feel clumsy, and chords you played cleanly yesterday might buzz today. Be patient with yourself. Consistent, daily practice for 15 minutes is infinitely more effective than a single two-hour practice session once a week.
Building a Consistent Daily Routine
To turn these techniques into permanent habits, design a simple, structured daily practice routine. Dedicate the first five minutes of your practice to warming up your hands with gentle finger stretches. Next, spend five minutes running through the "pluck test" on three or four of your target chord shapes, adjusting your finger placement until every note rings out clearly.
Follow this with five minutes of slow, deliberate transition practice between two chords, focusing on keeping your movements minimal and your fingers close to the fretboard. Finally, apply these chords to a real musical context by playing through a song or a simple chord progression. By focusing on quality of movement rather than speed, you will naturally develop the clean, precise technique that defines great guitar playing.
Related Chords.me Guides
For the next step, read Chromatic Tuner Guitar Guide: How to Tune Accurately as a Beginner, CAGED System Guitar Explained: Complete Beginner’s Guide to Fretboard Mast, and Beginner Guitar Lessons Roadmap: Your Step-by-Step Path to Playing Songs before moving on. You can also test the same idea in another key and check each string with the guitar tuner while practicing this lesson.
Practice This With Chords.me
Use the Chord Transposer to test the idea in another key, then practice the same example slowly. Focus on clean notes and steady timing before increasing speed.
Frequently Asked Questions
What is the best way to play guitar chords cleanly?
The best way to play guitar chords cleanly is to slow the movement down, use a tuned guitar, and repeat a short exercise until it feels controlled. Speed should come after clean sound and steady timing.
Is how to play guitar chords cleanly hard for beginners?
It can feel difficult at first, but it becomes manageable when you break it into small steps. Focus on clean notes, relaxed hands, and short practice sessions instead of trying to master everything in one day.
What should I practice first for how to play guitar chords cleanly?
Start with the simplest version of the idea: one chord, one pattern, one short exercise, or one small section of the fretboard. Once that feels stable, add timing, transitions, or a second example.
What common mistakes should I avoid?
Avoid rushing, pressing harder than necessary, ignoring tuning, and practicing mistakes at full speed. Slow, accurate repetitions usually fix beginner problems faster than long unfocused practice sessions.
Which Chords.me tool helps with this topic?
The Guitar Tuner is the best supporting tool here because it helps with checking pitch, tuning stability, and practice accuracy. Use it before or during practice so the article’s examples translate into real playing more easily.
About the Contributor
Chords.me Tuning & Setup Desk Tuning, strings, and setup contributor
A brand contributor profile for Chords.me tuning and setup content. This desk focuses on tuning accuracy, string choice, fret buzz, intonation, action, and maintenance topics for everyday players. Content is checked for practical clarity, beginner readability, and accurate links to relevant Chords.me tools.