Travis Picking Explained: Beginner Guide
Travis Picking Explained: Beginner Guide: clear guitar guide with practical examples, common mistakes, and Chords.me practice tools.

When you listen to classic folk, country, or indie acoustic guitar, you often hear what sounds like two distinct guitarists playing at the same time. One player seems to be holding down a steady, driving bassline, while the other weaves a sweet, syncopated melody over the top.
In almost every case, you are actually listening to a single guitarist utilizing a technique called Travis picking. Named after the legendary country guitarist Merle Travis, this style of playing is the bedrock of modern acoustic fingerstyle guitar.
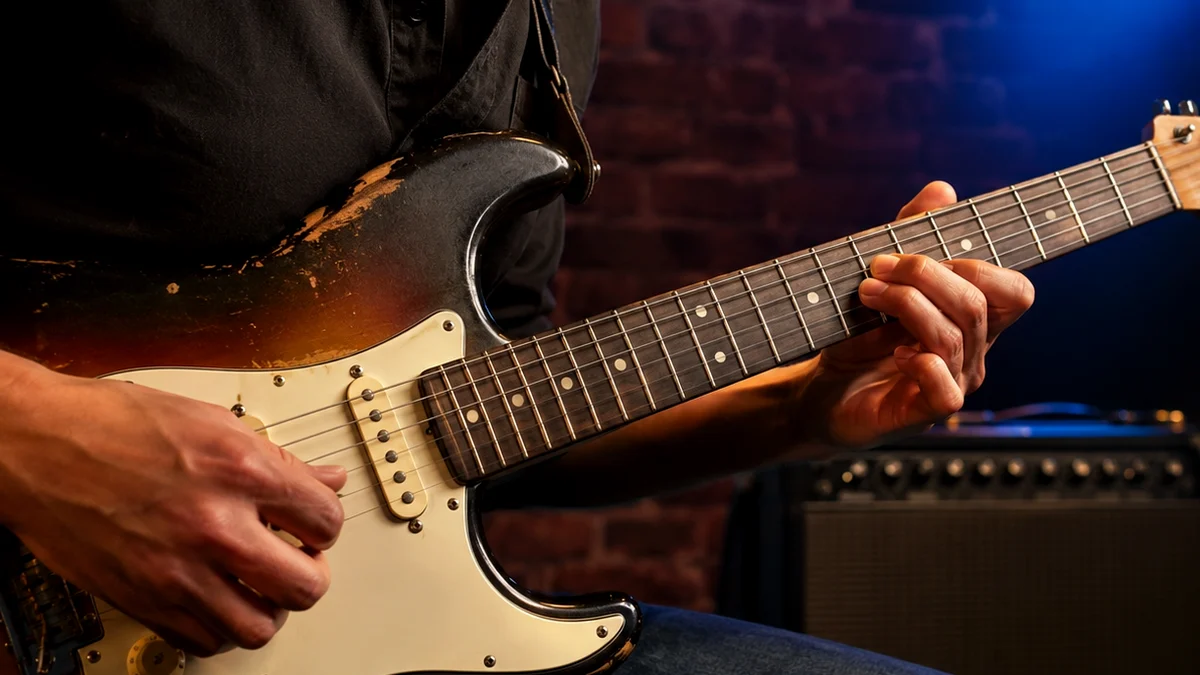
If you have ever wanted to make your solo acoustic playing sound full, rhythmic, and self-contained, learning this technique is the single best investment of your practice time. This guide will demystify the mechanics of the style, break down the learning process into manageable steps, and help you avoid the common pitfalls that trip up most beginners.
What Is Travis Picking?
Travis picking is a fingerstyle guitar technique where the player's thumb maintains a steady, alternating bass pattern on the lower strings (usually the 6th, 5th, and 4th strings) while the index and middle fingers pluck syncopated melody notes on the higher treble strings (the 3rd, 2nd, and 1st strings).
Steady Alternating Bass (Thumb) <-- Focus of your rhythmic foundation
+
Syncopated Treble Melody (Fingers) <-- Focus of your melodic expression
=
TRAVIS PICKING PATTERN
Is Travis Picking Good for Beginners?
Many beginner guitarists look at fingerstyle guitar and assume it is far too advanced for their current skill level. However, Travis picking is actually one of the most accessible entry points into the world of fingerstyle.
While it requires coordination, the underlying structure of the technique is highly systematic. Unlike free-form classical fingerstyle, Travis picking relies on repeating mechanical patterns. Once your thumb memorizes the alternating movement, your hand goes on autopilot.
Learning this technique early in your guitar learning offers several strong benefits:
- Improves Timing: Because your thumb acts as a human metronome, practicing this style naturally develops an rock-solid internal sense of rhythm.
- Builds Hand Independence: It forces your thumb and fingers to operate as independent units, a skill that translates to all other genres of music.
- improves Simple Chords: You do not need to know complex jazz chords to sound sophisticated. A simple open C major or G major chord sounds incredibly intricate when Travis picked.
If you can hold down basic open chord shapes and have a little patience, you are fully capable of learning this style.
How to Learn Travis Picking Step by Step
The practical way to mastering this technique is to avoid playing the entire pattern at once. If you try to coordinate your thumb and fingers simultaneously from day one, your brain will likely short-circuit.
Instead, we will break the movement down into four progressive phases. Grab your guitar, tune it up, and let’s walk through the process step by step.
Step 1: Establish the Alternating Bass (The Engine)
The thumb is the engine of Travis picking. It must play steady quarter notes without stopping, slowing down, or speeding up.
For this first step, we will use a standard open C major chord. Your thumb will alternate between the 5th string (C note, the root) and the 4th string (E note).
Fret your C major chord and try playing only with your thumb:
Count: 1 2 3 4
E|---------------------------|
B|---------------------------|
G|---------------------------|
D|--------E-----------E------| <-- Thumb plays here (4th string)
A|--C-----------C------------| <-- Thumb plays here (5th string)
E|---------------------------|
Practice Tip: Play this simple alternating pattern for several minutes. Do not move on to Step 2 until you can do this while holding a conversation or watching television. Your thumb must function automatically.
Step 2: Introduce "The Pinch"
Now that your thumb is running on autopilot, we need to introduce your index finger. The easiest way to start is by plucking a treble string at the exact same time as one of your bass notes. Guitarists call this a "pinch."
We will pinch the 5th string (with the thumb) and the 2nd string (with the index finger) on beat one. On beats two, three, and four, your thumb will continue its alternating learning process alone.
Count: 1 2 3 4
E|---------------------------|
B|------D*-------------------| <-- Index finger pinches here on Beat 1
G|---------------------------|
D|--------E-----------E------| <-- Thumb alternates
A|------C*----------C--------| <-- Thumb pinches here on Beat 1
E|---------------------------|
^
(Pinch)
Notice how the index finger only plays once, right at the start of the measure. Keep the tempo slow and ensure both strings ring out at precisely the same millisecond.
Step 3: Play Between the Beats (Syncopation)
Travis picking gets its syncopated, rolling feel by placing melody notes on the "and" beats (the off-beats between the steady quarter notes).
In this step, we will pluck a treble string immediately after your thumb plays a bass note.
Count: 1 & 2 & 3 & 4 &
E|--------------------------------------|
B|------------------D*------------------| <-- Index finger plays on the "and" of 2
G|--------------------------------------|
D|----------E---------------E-----------| <-- Thumb plays steady on 2 and 4
A|------C---------------C---------------| <-- Thumb plays steady on 1 and 3
E|--------------------------------------|
Listen closely to the rhythm. The index finger should fall exactly halfway between beat two and beat three. If your thumb hesitates or alters its timing to accommodate the index finger, slow down.
Step 4: The Classic "Inside-Out" Pattern
Now we are ready to combine these elements into a classic, versatile pattern known as the "inside-out" Travis pick. It is called inside-out because the fingers pluck strings that lie physically inside the outer bass strings, then move outward.
We will use four strings for this pattern: the 5th, 4th, 3rd, and 2nd strings.
- Beat 1: Thumb plays the 5th string.
- Beat 2: Thumb plays the 4th string.
- Beat 2 &: Index finger plays the 3rd string.
- Beat 3: Thumb plays the 5th string.
- Beat 3 &: Middle finger plays the 2nd string.
- Beat 4: Thumb plays the 4th string.
Here is what the tab looks like over a C major chord:
Count: 1 2 & 3 & 4
E|------------------------------|
B|------------------M*----------| <-- Middle finger (2nd string)
G|----------I*------------------| <-- Index finger (3rd string)
D|------T-------T-----------T---| <-- Thumb alternates (4th string)
A|--T-------------------T-------| <-- Thumb alternates (5th string)
E|------------------------------|
This pattern is highly symmetrical and forms the basis of hundreds of famous acoustic songs. Spend time looping this slowly, focusing entirely on clean execution and steady rhythm.
How Do You Use Travis Picking in Real Songs?
Once you have memorized the basic mechanics of the inside-out pattern, you can begin applying it to different chord progressions.
The primary adjustment you must make when changing chords is the string assignment of your thumb. Your thumb should almost always play the root note of the chord on beat one.
- For 5-string chords (like C, Am, Bm): Your thumb alternates between the 5th string and the 4th string.
- For 6-string chords (like G, Em, F): Your thumb alternates between the 6th string and the 4th string.
- For 4-string chords (like D, Dm): Your thumb alternates between the 4th string and the 3rd string (your index and middle fingers will shift up to the 2nd and 1st strings to accommodate this).
Applying the Pattern to a Simple Chord Progression
Try practicing this common 4-chord progression using the inside-out pattern: C - Am - F - G.
When transitioning to the F and G major chords, remember to jump your thumb up to the 6th string for the first bass note of the measure.
C Major Am
E|----------------------------|----------------------------|
B|----------------1-----------|----------------1-----------|
G|----------0-----------------|----------2-----------------|
D|------2-------2---------2---|------2-------2---------2---|
A|--3-----------------3-------|--0-----------------0-------|
E|----------------------------|----------------------------|

F Major (Thumb on 6) G Major (Thumb on 6)
E|----------------------------|----------------------------|
B|----------------1-----------|----------------0-----------|
G|----------2-----------------|----------0-----------------|
D|------3-------3---------3---|------0-------0---------0---|
A|----------------------------|----------------------------|
E|--1-----------------1-------|--3-----------------3-------|
Adapting Songs to Your Voice
When you begin learning real songs that use Travis picking, you might find that the vocal key is too high or too low for you to sing comfortably.
Because Travis picking requires open chord shapes to sound fluid, simply shifting the chord shapes up the neck can be incredibly difficult. This is where tools like the Chords.me Capo Calculator and Chord Transposer become invaluable.
By using these tools, you can easily transpose a song into a key that fits your vocal range while keeping the easy-to-play open C, Am, G, and Em shapes that make Travis picking feel so natural under your fingers.

Travis Picking Mistakes Beginners Make (and How to Fix Them)
It is completely normal to struggle with coordination when first learning this style. However, many players accidentally reinforce bad habits during their practice sessions that limit their speed and accuracy later on.
Avoid these three common mistakes to ensure your playing remains clean and effortless.
1. Rushing the Tempo (Poor Timing)
The most common mistake is letting the fingers pull the thumb out of rhythm. When your index or middle finger plucks a note, there is a natural tendency to speed up the subsequent bass note.
To prevent this, you must practice with a metronome or a steady rhythm track.
Pro-Tip: If you do not know the exact speed of the song you are trying to learn, use the Tap Tempo tool on Chords.me. Simply tap along to the original recording to find the exact Beats Per Minute (BPM). Once you know the target speed, set your metronome to exactly half of that tempo (50% speed) to practice your Travis picking pattern with perfect accuracy.
2. "Flying" Fingers
Watch your picking hand in a mirror. Are your index, middle, and ring fingers flying far away from the strings after they pluck?
This is called "flying fingers," and it ruins your efficiency. The further your fingers travel from the strings, the more time and effort it takes to bring them back for the next note.
Keep your picking hand relaxed and curved like a claw. Your fingers should hover mere millimeters away from the strings they are responsible for playing.
3. Playing the Bass Too Loudly
Because the thumb is a larger, stronger digit than the fingers, beginners often strike the bass strings with far too much force. This creates an unbalanced tone where the bass drowns out the sweet melody notes on the treble strings.
Practice playing your alternating bass softly. The bass should act as a supportive, warm pad of sound, while your treble fingers pluck the strings with slightly more definition to let the melody sing out clearly.
Travis Picking Practice Matrix
To help you structure your daily practice routine, use this simple matrix. Dedicating just 15 minutes a day to these specific focus areas will yield noticeable results within a single week.
| Skill | Practice Method | Daily Time | Common Mistake to Avoid |
|---|---|---|---|
| Thumb Independence | Alternate between 5th and 4th strings using a metronome. Do not use fingers. | 5 Minutes | Letting the tempo drift or swing. |
| The Pinch Coordination | Play a bass note and treble note simultaneously on beat one, followed by steady bass. | 3 Minutes | Plucking the two notes slightly out of sync. |
| Syncopation Control | Place a single treble note on the "and" of beat two. | 4 Minutes | Pausing the thumb when the finger plays. |
| Full Pattern Integration | Play the entire inside-out pattern over a C - G chord progression. | 3 Minutes | Rushing the transitions between chords. |
Refining Your Tone and Accuracy
As you become more comfortable with the physical patterns, you should shift your focus from simply playing the correct notes to refining the overall quality of your tone.
Hand Position and Angle
Your picking hand should not sit parallel to the strings. Instead, arch your wrist slightly so your hand approaches the strings at an angle. This allows your thumb to strike the bass strings cleanly without bumping into your index finger.
Your thumb should always remain slightly ahead of your fingers (closer to the neck of the guitar). This spatial separation prevents your thumb and index finger from colliding when they are playing adjacent strings.
Guitar Neck
│
(Thumb Position) <-- Closer to neck
│
(Finger Position) <-- Closer to bridge
│
Guitar Bridge
To Use Nails or Flesh?
One of the oldest debates in fingerstyle guitar is whether to play with your fingernails or the flesh of your fingertips.
- Flesh Only: Produces a warm, round, and vintage folk tone. It is highly forgiving of minor technique errors but lacks bright projection.
- Nails (or Fingerpicks): Produces a bright, sharp, and articulate tone with excellent volume. This is the classic sound of country and bluegrass players.
As a beginner, start by using the flesh of your fingers. It allows you to develop a direct physical connection to the strings. Once your accuracy is established, you can experiment with growing your fingernails out slightly or using plastic fingerpicks to see which tone you prefer.
Moving Forward on Your Fingerstyle learning process
Mastering Travis picking is a transformative milestone for any guitarist. It transitions your playing from basic accompaniment to a complete, self-contained musical performance.
Be patient with yourself during the first few days of practice. The coordination required can feel unnatural at first, but with consistent, slow practice, your muscle memory will take over.
Once you can comfortably play the patterns outlined in this guide, head over to the Chords.me Chord Sheet PDF Generator to print out clean, easy-to-read chord sheets of your favorite songs. Use the transposer to find the perfect key, grab your capo, and start applying your new Travis picking skills to the music you love. With steady practice and the right tools, you will be amazed at how quickly your acoustic guitar playing comes alive.
Related Chords.me Guides
For the next step, read Beginner Guitar Lessons Roadmap: Your Step-by-Step Path to Playing Songs, How to Read Guitar Tabs: Beginner Guide, and Guitar Tabs Explained for Beginners: A Complete Step-by-Step Guide before moving on. You can also test the same idea in another key and keep practice timing steady with the tap tempo tool while practicing this lesson.
Practice This With Chords.me
Use the Tap Tempo to keep the exercise slow, steady, and repeatable. Focus on clean notes and steady timing before increasing speed.
Frequently Asked Questions
What is Travis Picking?
Travis Picking is a guitar-learning topic that helps players build a clearer connection between technique, sound, and practice. For beginners, the most useful approach is to learn the basic idea first, then apply it slowly on a tuned guitar.
Is travis picking hard for beginners?
It can feel difficult at first, but it becomes manageable when you break it into small steps. Focus on clean notes, relaxed hands, and short practice sessions instead of trying to master everything in one day.
What should I practice first for travis picking?
Start with the simplest version of the idea: one chord, one pattern, one short exercise, or one small section of the fretboard. Once that feels stable, add timing, transitions, or a second example.
What common mistakes should I avoid?
Avoid rushing, pressing harder than necessary, ignoring tuning, and practicing mistakes at full speed. Slow, accurate repetitions usually fix beginner problems faster than long unfocused practice sessions.
Which Chords.me tool helps with this topic?
The Guitar Tuner is the best supporting tool here because it helps with checking pitch, tuning stability, and practice accuracy. Use it before or during practice so the article’s examples translate into real playing more easily.
About the Contributor
Chords.me Tuning & Setup Desk Tuning, strings, and setup contributor
A brand contributor profile for Chords.me tuning and setup content. This desk focuses on tuning accuracy, string choice, fret buzz, intonation, action, and maintenance topics for everyday players. Content is checked for practical clarity, beginner readability, and accurate links to relevant Chords.me tools.