Beginner Guitar Lessons Roadmap: Your Step-by-Step Path to Playing Songs
Beginner Guitar Lessons Roadmap: Your Step-by-Step Path to Playing Songs: clear guitar guide with practical examples, common mistakes, and Chords.me practice tools.
Standing in front of a new guitar can feel both exciting and overwhelming. You have an instrument capable of expressing strong emotion, yet your fingers do not yet know where to go, the strings might hurt your fingertips, and the amount of online tutorials can leave you spinning. To make real progress, you need a structured path that tells you exactly what to focus on today, tomorrow, and next week.
This beginner guitar lessons roadmap is made to give you a clear path. By breaking down the learning process into logical, sequential phases, you will build a solid foundation of physical technique, rhythmic timing, and musical understanding.

What is a Beginner Guitar Lessons Roadmap? A beginner guitar lessons roadmap is a structured, step-by-step learning framework made to guide new players from their very first day holding a guitar to playing complete songs with clean tone and steady timing. It breaks down essential skills—such as tuning, open chords, strumming patterns, and chord transitions—into logical, sequential phases to prevent overwhelm and build consistent playing habits.
Is a Structured Roadmap Good for Beginners
When starting out, many players fall into the trap of searching for random video tutorials. One day they try to learn a complex guitar solo, the next they attempt a difficult fingerpicking pattern, and the day after they try to memorize music theory. This disjointed approach often leads to frustration, bad physical habits, and ultimately, quitting the instrument.
A structured beginner guitar lessons roadmap is highly beneficial for beginners because it respects the physical and cognitive limits of learning an instrument. Your hands need time to build calluses, your fingers must develop fine motor control, and your brain needs to process rhythm and pitch simultaneously. By following a step-by-step path, you ensure that each new skill you learn is built on top of a stable foundation. You do not try to run before you can walk.
Using a roadmap also helps you track your progress. Instead of feeling like you are getting nowhere, you can look at your checklist and see that you have mastered tuning, clean chord shapes, and basic strumming. This sense of accomplishment is what keeps you motivated to pick up the guitar every single day.
Phase 1: Getting to Know Your Instrument and Tuning Up
Before you press down on a single fret, you must understand the tool you are working with. The guitar is a mechanical device, and knowing how its parts interact will make your practice sessions much more productive.
Understanding Your Guitar's Anatomy
The guitar is divided into three main sections: the headstock, the neck, and the body.
- The Headstock: Located at the top of the guitar, this holds the tuning pegs (or machine heads). Turning these pegs tightens or loosens the strings, raising or lowering their pitch.
- The Neck: This is the long wooden shaft where your fretting hand will spend its time. The metal strips running vertically across the neck are called frets. The spaces between these metal strips are where you place your fingers to change the pitch of the strings.
- The Body: The large, hollow (for acoustic) or solid (for electric) part of the guitar. It features the bridge, which secures the strings to the lower half of the instrument.
Tuning the Guitar
An out-of-tune guitar will sound unpleasant even if your finger placement is completely correct. Tuning is a non-negotiable skill that you must perform every single time you pick up the instrument.
The standard tuning for a six-string guitar, from the thickest string (lowest pitch) to the thinnest string (highest pitch), is:
- E (6th string - thickest)
- A (5th string)
- D (4th string)
- G (3rd string)
- B (2nd string)
- E (1st string - thinnest)
A common mnemonic to remember this order is "Eddie Ate Dynamite, Good Bye Eddie."
To get your instrument perfectly in tune, use the Guitar Tuner. This tool provides real-time visual feedback, helping you adjust your tuning pegs slowly and accurately until each string registers the correct pitch. Pluck one string at a time, let the note ring out, check the tuner, and adjust the peg. If the pitch is too low (flat), tighten the string. If the pitch is too high (sharp), loosen the string.
Phase 2: Building Your First Chord Vocabulary
For the next beginner step, compare this lesson with Guitar Size Chart for Kids and Adults and How to Hold a Guitar Correctly so each practice topic supports the next one.
Once your guitar is in tune, you are ready to start making music. In beginner guitar lessons for beginners, the quickest way to play recognizable music is by learning open chords. These are chords played at the top of the neck that include at least one un-fretted (open) string.
The Core Beginner Chords
You do not need to learn dozens of chords to start playing songs. In fact, mastering just four or five core chords will help you learn hundreds of famous pop, rock, folk, and country tunes. Start with these essential shapes:
- E Minor (Em): This is often the easiest chord for beginners. It requires only two fingers. Place your middle finger on the second fret of the A (5th) string and your ring finger on the second fret of the D (4th) string. Strum all six strings.
- A Minor (Am): This shape is very similar to E minor but shifted down one string. Place your middle finger on the second fret of the D (4th) string, your ring finger on the second fret of the G (3rd) string, and your index finger on the first fret of the B (2nd) string. Strum from the A string down (do not play the thick E string).
- C Major (C): Place your ring finger on the third fret of the A (5th) string, your middle finger on the second fret of the D (4th) string, and your index finger on the first fret of the B (2nd) string. Strum five strings, omitting the low E string.
- G Major (G): Place your middle finger on the third fret of the low E (6th) string, your index finger on the second fret of the A (5th) string, and your ring finger on the third fret of the high E (1st) string. Strum all six strings.
- D Major (D): Place your index finger on the second fret of the G (3rd) string, your ring finger on the third fret of the B (2nd) string, and your middle finger on the second fret of the high E (1st) string. Strum from the D (4th) string down.
Developing Good Fretting Technique
To ensure your chords sound clear and free of buzzing, you must focus on physical technique:
- Use the tips of your fingers: Press down on the strings using the very tips of your fingers, not the flat pads. This prevents your fingers from accidentally touching and muting adjacent strings.
- Keep your fingers curled: Your knuckles should form a curved arch over the fretboard.
- Place fingers close to the frets: Do not place your finger directly on top of the metal fret wire, but place it just behind the fret. This requires less physical pressure to produce a clean tone.
- Keep your thumb low: Position your thumb on the middle of the back of the neck, rather than wrapping it over the top. This provides your fingers with the leverage and reach they need to stretch across the fretboard.
Phase 3: Developing Rhythm, Timing, and Strumming
Having great chord shapes means very little if you cannot play them in time. Rhythm is the heartbeat of music, and developing a steady sense of timing is what separates a mechanical-sounding player from a musical one.
The Golden Rule of Strumming
When learning how to learn beginner guitar lessons step by step, the most important physical habit to build is the constant motion of your strumming arm. Your arm should act like a steady pendulum, moving down and up continuously in time with the music, even when you are not actually striking the strings.
In a standard 4/4 time signature (where you count 1, 2, 3, 4), your hand should move down on the beats (1, 2, 3, 4) and up on the off-beats (the "and" between the numbers).
- Quarter Note Strumming: Strum down on every beat.
- Count:
1 2 3 4 - Strum:
D D D D - Eighth Note Strumming: Strum down on the beat and up on the off-beat.
- Count:
1 & 2 & 3 & 4 & - Strum:
D U D U D U D U
Using Tools to Build Accuracy
To build solid timing, you must practice with an external timekeeping source. Do not rely solely on your internal clock, which will naturally speed up during easy parts and slow down during difficult chord changes.
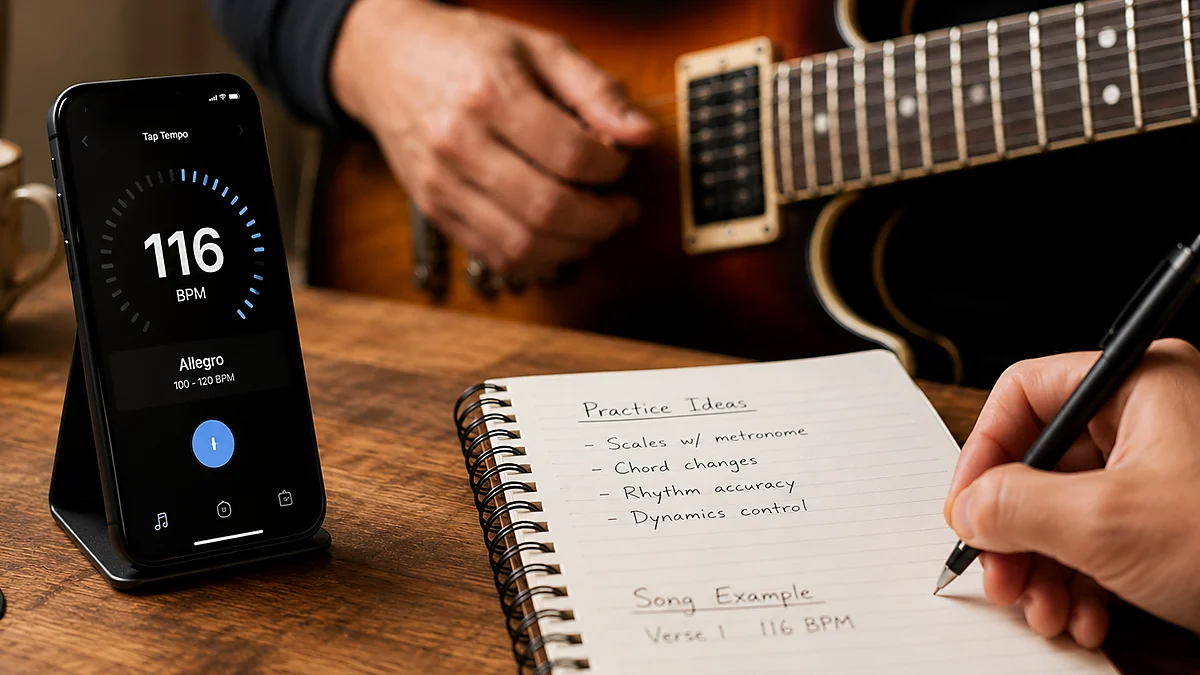
Use the Chords.me Tap BPM tool to find the tempo of a song you want to learn. Once you know the beats per minute (BPM), set a metronome to that exact speed. Start practicing your strumming patterns slowly, perhaps at 60 BPM. Ensure that every downward strum aligns perfectly with the click of the metronome. Once you can play the pattern with 100% accuracy for two minutes without stopping, increase the speed by 5 BPM.

Phase 4: Navigating Chord Transitions and Smooth Changes
The biggest hurdle for most beginners is not pressing down on a chord, but switching from one chord to another without pausing. If your strumming hand has to stop moving while your fretting hand searches for the next shape, the momentum of the song is lost.
The Pivot Finger Technique
Many chord transitions on the guitar share common fingers or positions. Recognizing these connections will save you a strong amount of physical effort.
- The Pivot Finger: This is a finger that stays on the exact same fret and string during a chord change. For example, when transitioning from C major to A minor, your index finger stays on the first fret of the B string, and your middle finger stays on the second fret of the D string. Only your ring finger needs to move. Do not lift your entire hand off the fretboard; keep those two anchor fingers firmly in place.
- The Common Shape: Sometimes two chords use the exact same finger relationship, just shifted to different strings. Moving from E minor to A minor is a prime example. The shape of your fingers remains identical; you simply shift the entire shape down by one string.
The One-Minute Changes Exercise
This is a highly effective practice method designed specifically to overcome slow chord transitions.
- Choose two chords you want to transition between (for example, G major and C major).
- Set a timer for one minute.
- Switch back and forth between the two chords as many times as possible within that minute.
- Do not worry about strumming a complex pattern; simply strum once on each chord to ensure all strings are ringing out clearly.
- Count how many successful transitions you make. Write this number down in a practice journal.
Over days and weeks of consistent practice, you will watch this number rise as your muscle memory takes over.
Phase 5: Reading Tablature, Chord Sheets, and Using Tools
As you build physical proficiency, you need to learn how to read the instructions that tell you what to play. You do not need to learn traditional sheet music to be a successful guitarist; instead, you will rely on guitar tablature (tab) and chord sheets.
How to Read Guitar Tablature
Guitar tab is a visual representation of the guitar neck. It features six horizontal lines, each representing one of the six strings on the instrument.
E|---------------------------------| (Thinnest string)
B|---------1---------------1-------|
G|-----0-------0-------0-------0---|
D|---2---2---2---2---2---2---2---2-|
A|-3---------------3---------------|
E|---------------------------------| (Thickest string)
The bottom line represents the thickest string (low E), and the top line represents the thinnest string (high E). The numbers placed on these lines indicate which fret you should press down. A "0" means play the string open (without fretting). If numbers are stacked vertically on top of one another, you play those notes at the same time as a chord. If they are spread out horizontally from left to right, you play them sequentially as individual notes.
Using Chord Sheets and Digital Tools
A chord sheet displays the lyrics of a song with the chord symbols written directly above the words where the chord changes occur.
To make your practice sessions smooth, utilize the digital tools available on Chords.me:
- Chord Transposer: If you find a song you love but the chords are too difficult (such as featuring F major or other barre chords), you can use the chord transposer to shift the song into an easier key (like G major or C major).
- Capo Calculator: If transposing the song changes the pitch so much that you can no longer sing along comfortably, the capo calculator will tell you exactly which fret to place your capo on to keep the song in your vocal range while still using easy, open chord shapes.
- Chord Sheet PDF Generator: Once you have transposed your song and calculated your capo position, use this tool to create a clean, printable PDF of the chord sheet. This keeps your practice space free of digital distractions.
Complete Beginner Practice Routine
Consistency is far more important than duration when learning the guitar. Practicing for 15 to 20 minutes every single day will yield significantly better results than practicing for two hours once a week. Your muscles and brain need sleep and recovery time to process the physical changes you are asking them to make.
Here is a highly effective, structured 20-minute daily practice routine made to maximize your development:
| Skill | Practice Method | Time Needed | Common Mistake |
|---|---|---|---|
| Tuning & Warm-up | Tune with the Chords.me Tuner; play simple single-note chromatic lines up and down the neck to warm up fingers. | 3 Minutes | Skipping tuning or playing with cold, stiff fingers. |
| Chord Accuracy | Hold a chord shape, pluck each string individually to check for buzzes, adjust finger placement, squeeze, release, and repeat. | 5 Minutes | Pressing too hard or ignoring muted strings. |
| Chord Transitions | Perform the "One-Minute Changes" exercise between two difficult chord pairs. | 5 Minutes | Lifting the entire hand off the fretboard instead of looking for anchor fingers. |
| Rhythm & Strumming | Practice a steady strumming pattern with a metronome or the Tap BPM tool. Focus on continuous arm movement. | 4 Minutes | Stopping the strumming hand when a mistake is made. |
| Song Application | Apply your skills to a real song using a printed chord sheet. Try to play through without stopping. | 3 Minutes | Trying to play the song at full tempo before mastering it slowly. |
Common Beginner Guitar Lessons Mistakes Beginners Make
Every guitarist makes mistakes when starting out. By knowing what these common pitfalls are, you can actively avoid them and speed up your learning curve.
1. Pressing Too Hard on the Strings
Many beginners believe that to get a clean note, they must squeeze the neck of the guitar with maximum force. This is not true. Squeezing too hard causes hand fatigue, can lead to repetitive strain injuries, and actually pulls the strings out of tune (making your notes sound sharp).
The Fix: Press down on a string just hard enough so that it contacts the metal fret wire. Pluck the string. Gradually release pressure until the string starts to buzz, then apply just a tiny bit of pressure back. That minimal point of contact is all the force you need.
2. Ignoring Buzzing Strings
When playing a chord, it is easy to ignore one or two strings that are buzzing or completely muted because the overall sound of the chord still feels recognizable. However, this builds bad physical habits that are incredibly difficult to break later on.
The Fix: Always audit your chords. Pluck each string of the chord shape one by one. If a string sounds dull or buzzy, stop. Look closely at your hand. Is a neighboring finger drooping and touching the buzzing string? Are you fretting too far back from the fret wire? Adjust your hand, clear up the sound, and then continue strumming.
3. Playing Too Fast Too Soon
It is natural to want to play your favorite songs at their original speed immediately. However, practicing a song fast with mistakes simply trains your brain and muscles to play those mistakes consistently.
The Fix: Slow down. If a song is written at 120 BPM, practice it at 60 BPM. If you make a mistake at 60 BPM, slow down to 50 BPM. Only when you can play the passage perfectly at a slow speed should you begin raising the tempo.
4. Neglecting the Right Hand (Strumming Hand)
Beginners often focus 95% of their attention on their fretting hand because that is where the physical shapes are made. However, your strumming hand is responsible for the overall feel, timing, and dynamics of the music. A song played with perfect chords but terrible rhythm will sound disjointed and unmusical.
The Fix: Spend time practicing your strumming patterns on completely muted strings. Lay your left hand gently across the strings to damp them, and focus entirely on the movement, relaxation, and timing of your right hand.
Taking Your Next Steps
Learning the guitar is a learning process of patience, muscle memory, and consistent effort. By following this roadmap step by step, you avoid the common traps of confusion and frustration that cause so many aspiring musicians to put their instruments away. Focus on clean hand placement, steady timing, and daily practice. Keep your guitar in tune, make use of practical online tools to simplify your learning process, and celebrate the small victories along the way. Every great guitarist you admire started exactly where you are standing right now.
Related Chords.me Guides
For the next step, read Chromatic Tuner Guitar Guide: How to Tune Accurately as a Beginner, Drop C Tuning Guide: Notes, Setup, and Common Mistakes, and Guitar Tabs for Beginners: Complete Step-by-Step Guide to Reading Tablatur before moving on. You can also check each string with the guitar tuner and keep practice timing steady with the tap tempo tool while practicing this lesson.
Practice This With Chords.me
Use the Chord Transposer to test the idea in another key, then practice the same example slowly. Focus on clean notes and steady timing before increasing speed.
Frequently Asked Questions
What is Guitar Lessons Roadmap?
Guitar Lessons Roadmap is a guitar-learning topic that helps players build a clearer connection between technique, sound, and practice. For beginners, the most useful approach is to learn the basic idea first, then apply it slowly on a tuned guitar.
Is guitar lessons roadmap hard for beginners?
It can feel difficult at first, but it becomes manageable when you break it into small steps. Focus on clean notes, relaxed hands, and short practice sessions instead of trying to master everything in one day.
What should I practice first for guitar lessons roadmap?
Start with the simplest version of the idea: one chord, one pattern, one short exercise, or one small section of the fretboard. Once that feels stable, add timing, transitions, or a second example.
What common mistakes should I avoid?
Avoid rushing, pressing harder than necessary, ignoring tuning, and practicing mistakes at full speed. Slow, accurate repetitions usually fix beginner problems faster than long unfocused practice sessions.
Which Chords.me tool helps with this topic?
The Guitar Tuner is the best supporting tool here because it helps with checking pitch, tuning stability, and practice accuracy. Use it before or during practice so the article’s examples translate into real playing more easily.
About the Contributor
Chords.me Tuning & Setup Desk Tuning, strings, and setup contributor
A brand contributor profile for Chords.me tuning and setup content. This desk focuses on tuning accuracy, string choice, fret buzz, intonation, action, and maintenance topics for everyday players. Content is checked for practical clarity, beginner readability, and accurate links to relevant Chords.me tools.