Alternate Picking for Guitar: A Clean, Relaxed Beginner Guide
Learn alternate picking with a relaxed grip, efficient pick strokes, three practical drills, a tempo plan, and fixes for common string-crossing mistakes.
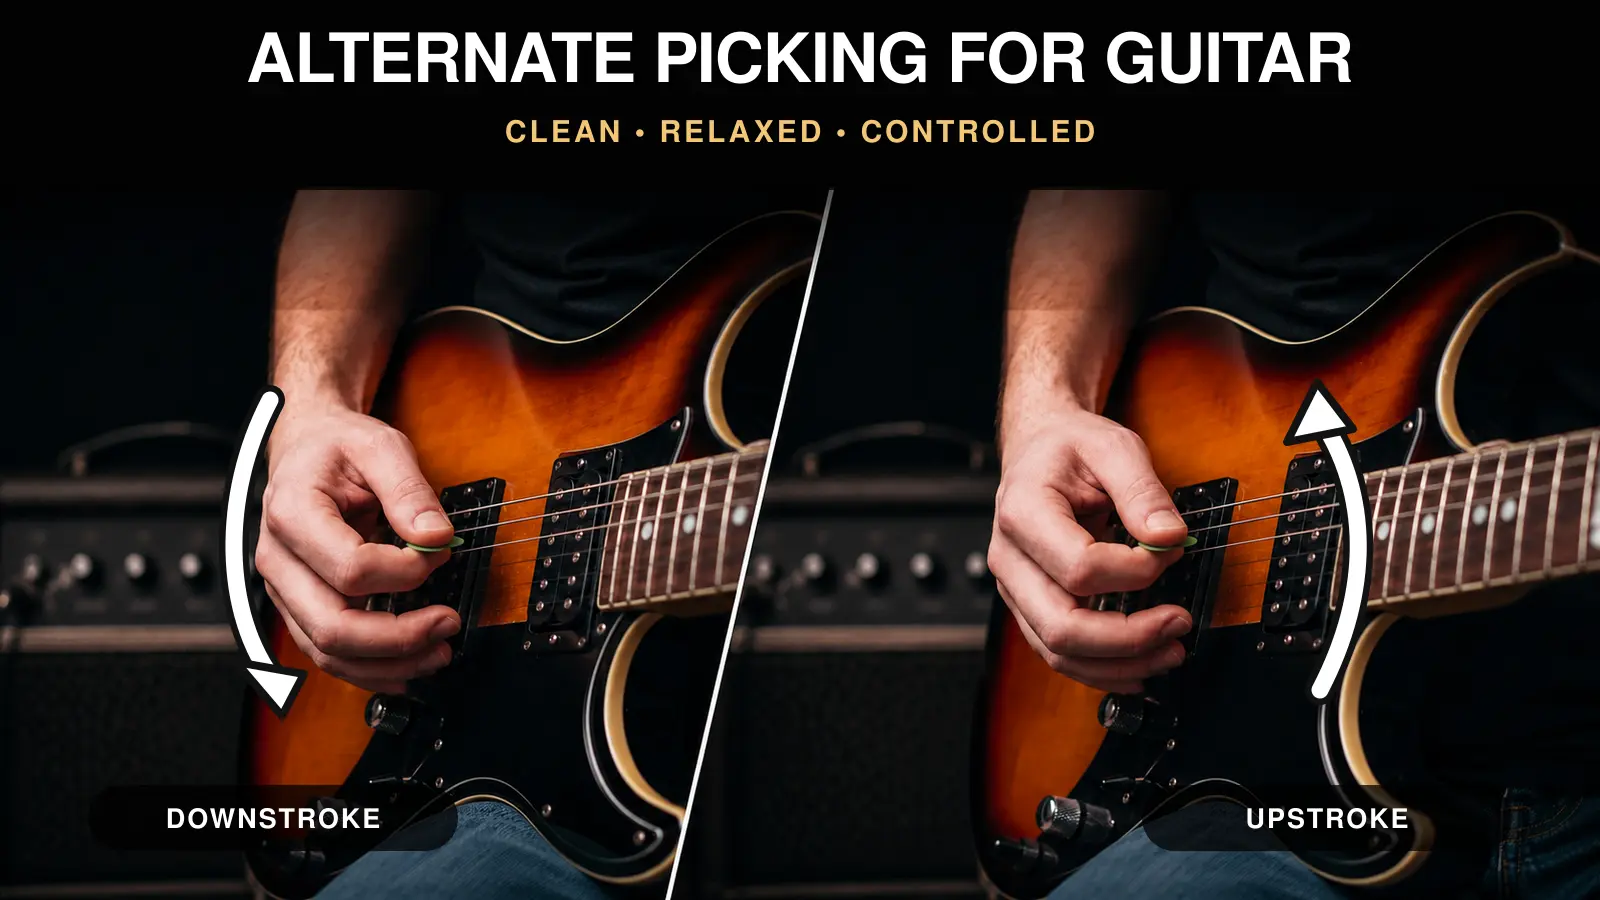
Alternate picking means playing consecutive notes with alternating downstrokes and upstrokes: down, up, down, up. The idea is simple. The difficult part is keeping the motion relaxed, the sound even, and the pattern consistent when you change strings.
This lesson gives you a practical starting position, three exercises, and a tempo system you can repeat without guessing. You do not need to chase speed yet. Your first goal is to make a downstroke and an upstroke sound equally clean.
What is alternate picking?
Alternate picking is a picking-hand pattern in which each picked note uses the opposite stroke from the previous note. If the first note is a downstroke, the next is an upstroke, then another downstroke, and so on.
The main benefit is not simply “using half the effort.” It is that the repeating motion can give your picking hand a predictable rhythmic cycle. That can improve timing and note separation when the movement stays small and comfortable.
Use alternate picking for:
- single-note riffs and melodies;
- scale and chromatic exercises;
- repeated notes on one string;
- passages that cross two or more strings.
It does not have to replace every other technique. Down-picking, economy picking, fingerstyle, and legato all create different sounds and solve different musical problems. Here, we are building a dependable default for evenly picked notes.
Set up your picking hand
There is no single hand position that fits every player or guitar. Use these points as a neutral starting setup and adjust slightly if your anatomy or instrument requires it.
1. Hold the pick without squeezing
Place the pick between your thumb and the side of your curled index finger. Expose only enough of the tip to contact the string comfortably. A large exposed tip can catch between the strings; hiding almost the entire pick can make your fingers brush the strings.
Use the lightest grip that keeps the pick stable. If your thumb joint turns white, your forearm tightens, or the pick feels locked in place, reduce the pressure.
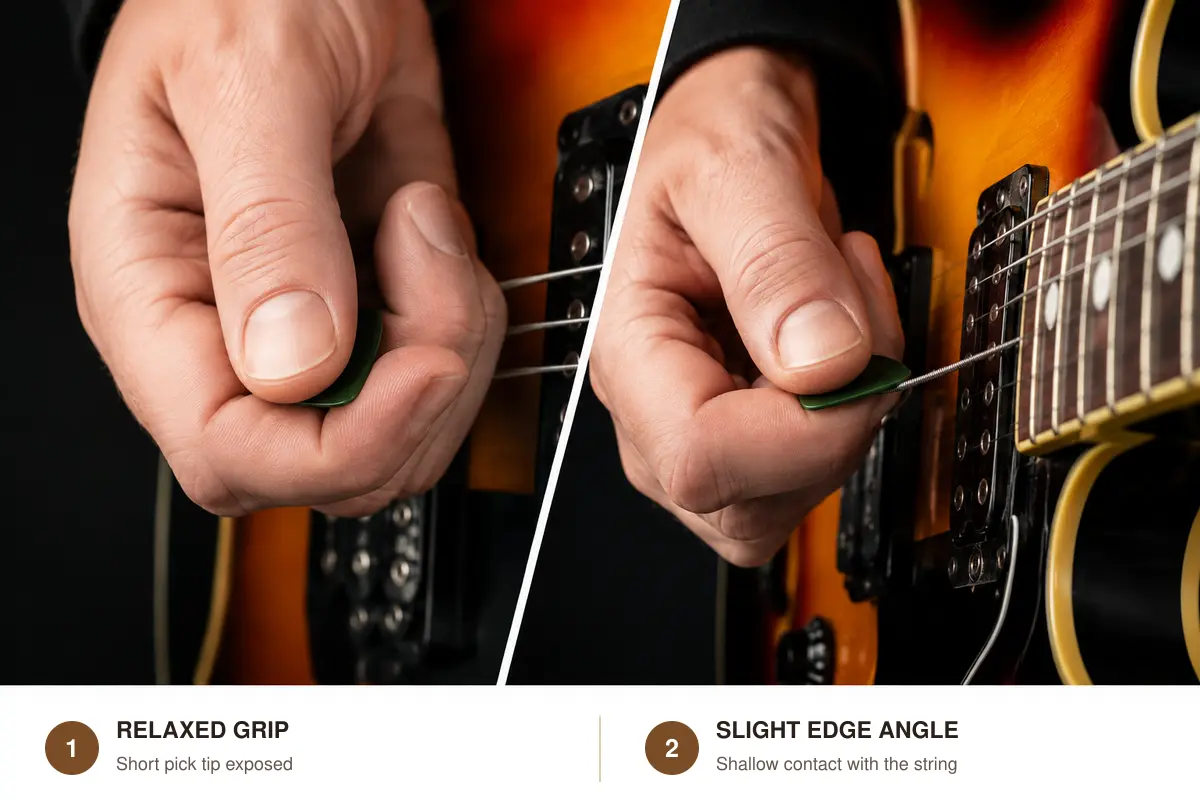
Left: use a relaxed grip with a short tip exposed. Right: a slight edge angle can reduce resistance without forcing a deep stroke.
2. Start with a nearly neutral pick angle
The pick can be flat against the string or tilted slightly so an edge meets the string first. A small tilt may reduce resistance, but there is no universal angle you must copy. Too much tilt can create a scratchy attack.
Listen as you adjust. Keep the position that gives you a clean sound without making the pick feel trapped.
3. Let the wrist lead the small motion
For this beginner drill, use a compact motion from the wrist with the forearm quiet and supported. The elbow does not need to pump for every note. Keep the shoulder down and the wrist free rather than rigid.
Stop and reset if you feel pain, tingling, or persistent strain. Fatigue is a signal to rest, not a challenge to push through.
4. Cross the string by a small amount
After each stroke, the pick only needs to clear the string. Wide movements create extra distance and make the next note harder to time. Think through the string, then stop nearby.
Three alternate-picking exercises
Tune the guitar first so you can judge clarity accurately. Then use a slow, steady pulse. If you are matching a recording, find its tempo with the Chords.me Tap Tempo tool, but begin your exercise well below the song's full speed.
Exercise 1: One open string
Choose the open D string. Play one note per click:
Count:   1   2   3   4
Stroke:  D   U   D   U
String:  D   D   D   D
Repeat for 30 seconds. Listen for three things:
- equal volume on downstrokes and upstrokes;
- a steady space between notes;
- no scrape from adjacent strings.
Next, play two notes per click while keeping the same relaxed motion. If the tone becomes uneven, return to one note per click.
Exercise 2: The 5–6–7–8 chromatic drill
On the low E string, play frets 5, 6, 7, and 8 with fingers 1, 2, 3, and 4. Keep strict down-up alternation:
Fret:    5   6   7   8
Finger:  1   2   3   4
Stroke:  D   U   D   U
Move the same pattern to the A, D, G, B, and high E strings. Keep the fretting fingers close to the fretboard and release unnecessary pressure after each note. The exercise trains hand synchronization; it is not a race.
Exercise 3: Two-string crossing
Play four notes on the D string, then four notes on the G string:
String:  D   D   D   D | G   G   G   G
Fret:    5   6   7   8 | 5   6   7   8
Stroke:  D   U   D   U | D   U   D   U
Because each group contains an even number of notes, the next string also begins with a downstroke. Once that feels stable, try groups of three notes. Odd-numbered groups change the stroke used at the start of the next string and expose weak string crossings.
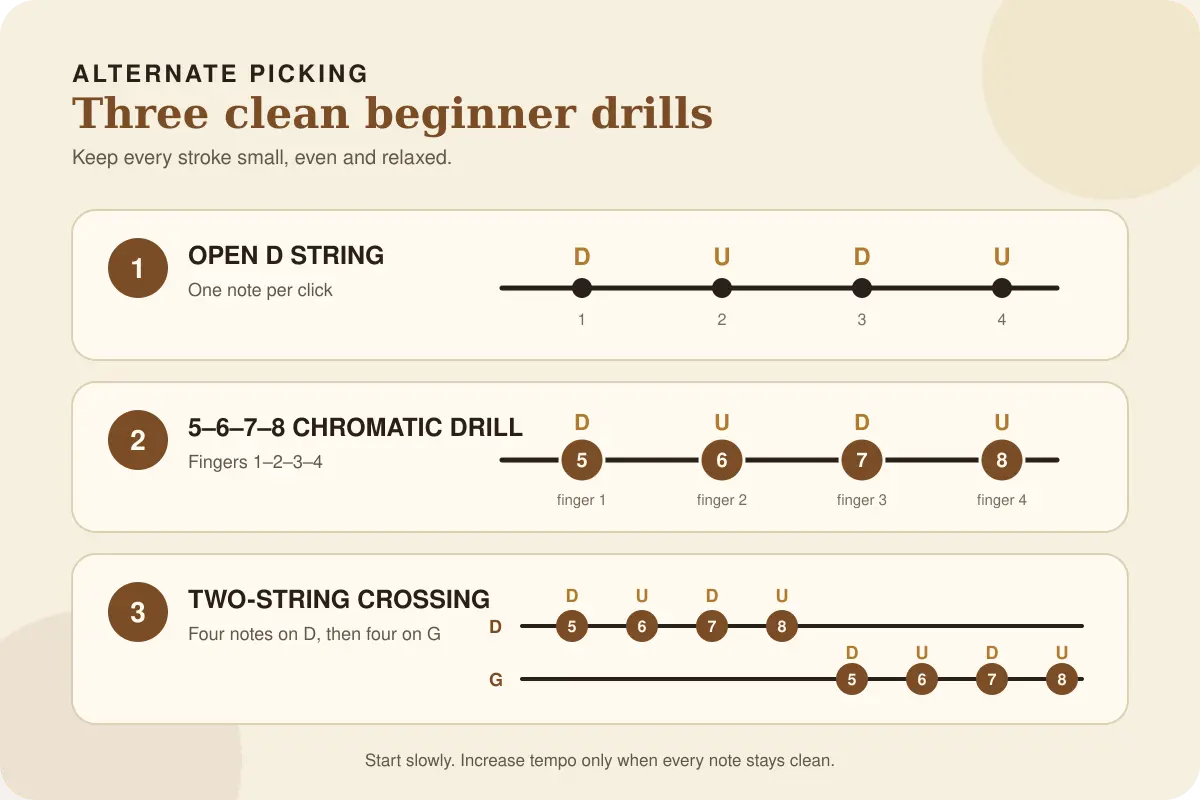
Use the same down-up cycle in each drill. Start slowly enough that every note remains clean.
A tempo plan that rewards clean repetitions
Choose a starting tempo at which you can complete the exercise without tension. For many beginners, that may be around 50–70 BPM, but the correct starting tempo is the one you can control today.
| Round | What to play | Success test |
|---|---|---|
| 1 | One note per click for 30 seconds | Down and up strokes sound even |
| 2 | Two notes per click for 30 seconds | Rhythm stays steady through the full round |
| 3 | Chromatic drill across six strings | No pause at a string change |
| 4 | Two-string drill three clean times | No unwanted adjacent-string noise |
Increase the tempo by 2–5 BPM only after you complete the current round cleanly several times. If mistakes repeat, lower the tempo and identify the exact transition that fails. Logging your comfortable tempo once a week is more useful than testing your maximum speed every day.
Common alternate-picking problems
The pick gets stuck on the upstroke
Reduce how deeply the pick enters the string. Then experiment with a very small edge angle. Do not solve the problem by squeezing the pick harder; that usually adds resistance elsewhere.
Downstrokes are louder than upstrokes
Play the open-string exercise and deliberately listen to the upstroke. You can lightly accent the upstroke for a few repetitions, then return to even dynamics. Record ten seconds on your phone; the imbalance is often easier to hear on playback.
The pattern breaks during a string change
Say “down, up” aloud while playing. Work with only two adjacent strings and one repeated note until the motion continues without a pause. Keep the rule strict during the drill, even if another picking choice might be useful in a real song.
The forearm tightens as the tempo rises
Stop, shake out the hand, and return at a lower tempo. Check whether your pick stroke has become wider or your grip has become tighter. Speed should come from a small repeatable movement, not from forcing the arm.
The fretting and picking hands do not land together
Use the 5–6–7–8 exercise on one string. Play slowly enough to hear whether the pick or the fretting finger arrives first. Short, accurate repetitions train synchronization better than playing the full exercise through repeated mistakes.
A focused 10-minute routine
- Tune — 1 minute: check all six strings with the online guitar tuner.
- Open string — 2 minutes: make downstrokes and upstrokes match.
- Chromatic drill — 3 minutes: move 5–6–7–8 across all strings.
- String crossing — 3 minutes: practise even- and odd-note groups on two strings.
- Review — 1 minute: write down your clean tempo and the transition that needs work.
This routine is short enough to repeat regularly and specific enough to measure. Finish while the movement still feels controlled.
Frequently asked questions
Should a beginner start alternate picking immediately?
Yes. As soon as you can pick a single string comfortably, you can practise slow down-up strokes. Keep down-picking for songs or sounds that need it, but build alternate picking as a separate coordination skill.
Should every phrase begin with a downstroke?
Not necessarily. Starting on a downstroke is convenient for a basic drill, but real phrases may begin on an upstroke depending on the rhythm and where the phrase starts. Practise both after your basic pattern is stable.
How hard should I hold the pick?
Firm enough that it does not rotate unexpectedly, but not so hard that the thumb, wrist, or forearm stiffens. The ideal pressure can change with pick material, string gauge, and playing dynamics.
When should I increase the tempo?
Increase it only when the rhythm, tone, string changes, and body position remain controlled for several repetitions. A small 2–5 BPM increase is easier to evaluate than a large jump.
Continue practising
Pair this lesson with How to Hold a Guitar Pick, Practice Guitar With a Metronome, and the Pentatonic Scale Guitar Guide. The same relaxed down-up motion should carry from the open-string drill into scales and real musical phrases.
About the Contributor
Chords.me Guitar Learning Desk Beginner guitar education team
The Chords.me Guitar Learning Desk creates practical lessons that connect guitar technique with useful practice tools. Each guide is reviewed for beginner clarity, realistic practice steps, and accurate links to related Chords.me resources.