6 Guitar String Names Explained
6 Guitar String Names Explained: clear guitar guide with practical examples, common mistakes, and Chords.me practice tools.

Every guitar learning process starts with the same physical reality: six strings stretched over a piece of wood. When you sit down with the instrument for the first time, these strings can look like an anonymous maze of steel or nylon. Learning their names is the first real step toward musical literacy. It is the key that helps you learn tuning, chord construction, scale patterns, and fretboard navigation.
Without this basic vocabulary, communicating with other musicians or using online learning tools becomes incredibly difficult. This guide will break down the names of the six guitar strings, explain how they are organized, and give you practical methods to memorize them quickly.

What Are the Guitar String Names?
On a standard six-string guitar, the string names from the thickest (lowest pitch) to the thinnest (highest pitch) are E, A, D, G, B, and E.
6th String: Low E (Thickest)
5th String: A
4th String: D
3rd String: G
2nd String: B
1st String: High E (Thinnest)
To use guitar string names correctly, always remember that they are numbered from 1 to 6, starting from the thinnest string (1st) up to the thickest string (6th). When you tune your instrument or read guitar tablature, you will refer to these letter names and numbers constantly to ensure your fingers are placed in the correct positions.
The Anatomy of the Six Guitar Strings
To understand how the guitar functions, you must look at how the strings are arranged physically and musically. Beginners often get confused by the relationship between the physical position of a string and its musical pitch.
On a standard right-handed guitar, the string closest to your face when you look down is the thickest string. This is the 6th string, tuned to a low E. The string closest to your knees is the thinnest string. This is the 1st string, tuned to a high E.
Musicians refer to pitch when they talk about "high" and "low." Even though the 6th string is physically at the top of the guitar neck when you hold it, it is called the "lowest" string because it produces the lowest bass pitch. Conversely, the 1st string is physically at the bottom of the neck, but it is called the "highest" string because it produces the highest treble pitch. Keeping this distinction clear in your mind will save you hours of confusion during practice.
Detailed Profiles of Each Guitar String
Each of the six strings has its own physical characteristics, tonal quality, and role in standard guitar playing. Let us look at each string individually, moving from the thickest to the thinnest.
The 6th String: Low E
The 6th string is the heaviest, thickest string on the guitar. It is tuned to a low E note (specifically E2 in scientific pitch notation, vibrating at approximately 82.4 Hz). Because of its thickness, it provides the deep, resonant bass foundation for your chords. It is the root note for many essential open chords, such as the E major and E minor shapes, and serves as the starting point for common bar chords along the neck.
The 5th String: A
Directly below the 6th string lies the 5th string, tuned to A (A2, vibrating at 110 Hz). This string is slightly thinner than the low E but still carries a strong bass character. It acts as the root note for open A major, A minor, and B7 chords. When you begin learning power chords for rock and blues, the 5th string will often serve as your root note anchor.
The 4th String: D
The 4th string is tuned to D (D3, vibrating at approximately 146.8 Hz). It occupies the middle ground of the guitar’s pitch range. On acoustic and electric guitars, this string is typically wound with metal wire, just like the 5th and 6th strings. It bridges the gap between the heavy bass strings and the brighter treble strings. It is the root note for the open D major and D minor chords.
The 3rd String: G
The 3rd string is tuned to G (G3, vibrating at approximately 196 Hz). On electric guitars, this string is usually plain, unwound steel, which makes it highly flexible and popular for string bending in blues and rock solos. On acoustic guitars, it is often wound, giving it a warmer, more balanced tone. The G string is historically known for being one of the more temperamental strings to keep in perfect tune due to its physical tension and position on the headstock.
The 2nd String: B
The 2nd string is tuned to B (B3, vibrating at approximately 246.9 Hz). It is an unwound steel string that has a bright, singing quality. The interval between the 3rd string (G) and the 2nd string (B) is unique. While all other adjacent strings are tuned a perfect fourth apart, the transition from G to B is a major third. This specific tuning choice makes common chord fingerings physically manageable for human fingers.
The 1st String: High E
The 1st string is the thinnest string on the instrument, tuned to a high E (E4, vibrating at approximately 329.6 Hz). It is made of thin, plain steel and carries the brightest, most piercing tone on the guitar. It is used extensively for playing melodies, solos, and highlight notes in open chords. Because it is so thin, it requires delicate handling during tuning to avoid snapping.
How to Learn Guitar String Names Step by Step
Memorizing these six letters in order is one of the first milestones of beginner guitar practice. You do not need hours of dry memorization to get this down. Instead, you can use a structured, multi-sensory approach to lock the names into your long-term memory.
Step 1: Use a Mnemonic Device
The easiest way to remember the sequence E-A-D-G-B-E from the 6th string to the 1st string is to use a memorable phrase. Here are a few classic mnemonics that guitar teachers have used for decades:
- Eat All Day, Go Bed Early
- Eddie Ate Dynamite, Good Bye Eddie
- Every Amateur Does Get Better Eventually
Choose the phrase that sticks in your mind most naturally. Recite it aloud while looking at your guitar strings, starting from the thickest (6th) and moving down to the thinnest (1st).
Step 2: Reverse the Direction
Once you can confidently name the strings from 6 to 1, practice going in reverse: from the 1st string (High E) to the 6th string (Low E). The letter sequence is E-B-G-D-A-E. You can use a reverse mnemonic for this direction as well:
- Every Beginning Guitarist Does All Exercises
- Extremely Bad Grocers Deliver Almost Everything
Practicing the order in both directions prevents your brain from relying on a single mental pathway. It ensures you can identify any string instantly, no matter which direction you are reading a chord sheet or tab.
Step 3: The Touch and Say Drill
Set a timer for two minutes during your practice session. Pick up your guitar. Without looking at a reference sheet, pluck the 6th string and say its name aloud: "E." Then, pluck the 5th string and say "A." Work your way down to the 1st string.
Once you reach the bottom, immediately reverse the process. This physical association between plucking the string, hearing its pitch, and speaking its name builds strong cognitive connections.
Step 4: Integrate Tuning into Your Routine
Tuning your instrument is Complete real-world application of string names. Every time you sit down to play, open the Guitar Tuner. As you pluck each string to check its pitch, look at the letter displayed on the screen.
If your low E string is flat, the tuner will show you how far you are from the note "E." By actively adjusting the tuning pegs while focusing on the target letter names, you reinforce your visual and auditory memory of the strings naturally.
Is Learning Guitar String Names Good for Beginners?
If you are wondering, is guitar string names good for beginners to learn on day one?, the answer is an absolute yes. Some students try to skip this step, preferring to rely solely on visual fretboard diagrams or physical finger placements. This approach quickly leads to a dead end.
Without knowing string names, you cannot:
1. Use a standard chromatic tuner effectively.
2. Read guitar tablature (which relies on knowing which line represents which string).
3. Communicate with bandmates, teachers, or online tutorials.
4. Understand where to place your fingers to find root notes for basic chords.
Learning the string names provides immediate benefits for your technique and tone. When you know exactly which string you are aiming for, your picking accuracy improves. You spend less time looking down at your hands and more time focusing on your rhythm and timing. It transforms the guitar from a confusing grid of wires into an organized, predictable musical map.
Common Guitar String Names Mistakes Beginners Make
Even with clear instructions, almost every beginner slips up on a few common points. Recognizing these pitfalls early will help you avoid bad habits and protect your gear.
Confusing the Two "E" Strings
Because both the 1st and 6th strings are tuned to the note E, beginners often confuse them when reading written instructions. If a tutorial tells you to "pluck the E string," you must look at the context. Usually, instructors will specify "Low E" (6th string) or "High E" (1st string). If they do not, look at the chord shape or tab to see which side of the fretboard is being played.
Tuning to the Wrong Octave
This is a highly common mistake that can lead to broken strings. A beginner might look at their tuner, see that they are trying to tune the 1st string to "E," and keep tightening the peg far past its intended pitch because they are chasing the wrong octave.
Always pay attention to the tension of the string. If a string feels incredibly tight and difficult to turn, stop turning. Back off, check the pitch against a reference tone on the Chords.me Guitar Tuner, and make sure you are not trying to tune a low string to a high octave.
Counting the Strings Backwards
It is highly intuitive to look down at your guitar and assume the string closest to your eyes is the "1st" string. However, musical notation works the opposite way. The 1st string is always the thinnest, highest-pitched string at the bottom.
If you try to read a chord chart while counting from top to bottom, your chords will sound completely dissonant. Always remind yourself: 1 is high, 6 is low.
Practical Exercises to Master String Recognition
To transition from memorizing the strings to using them automatically during performance, you need to practice active recall. Here are three simple exercises you can add to your daily routine.
Exercise 1: The Random String Jump
Instead of practicing the strings in a linear order (6 to 1), try jumping across the fretboard. Write the numbers 1 through 6 on small slips of paper and put them in a cup. Draw a slip, look at the number, and immediately pluck that string while calling out its letter name.
For example, if you draw "3," you must pluck the G string and say "G." This drill breaks the habit of relying on your mnemonic phrase to find a string, building true instant recall.
Exercise 2: The Root Note Strum
Pick a simple open chord you already know, such as C major. Before you strum the entire chord, locate the string that holds the root note (for C major, this is the 5th string, C). Pluck that single string first to establish a clean tone, and then strum the remaining strings of the chord.
This practice builds excellent picking accuracy and teaches your ear to identify the bass foundation of your chords.
Exercise 3: The Octave Match
Pluck your open 6th string (Low E). Then, pluck your open 1st string (High E). Listen closely to the relationship between the two pitches. They are the same musical note, but separated by two octaves.
Next, fret the 2nd fret of the 4th string (D string), which is also an E note. Pluck all three E notes one after another. This simple ear-training exercise helps you hear how the same letter name repeats across different registers of the guitar.
Reference Table for Guitar String Practice
To help you organize your daily practice sessions, use this reference table to track your progress and address common technical issues.
| Skill | Practice Method | Time Needed | Common Mistake to Avoid |
|---|---|---|---|
| String Identification | Recite mnemonics forward and backward while plucking. | 2 minutes daily | Skipping the reverse order; only knowing strings from 6 to 1. |
| Tuning Accuracy | Use the Chords.me Guitar Tuner before every session. | 3 minutes daily | Over-tightening strings past their target octave. |
| Picking Accuracy | The Random String Jump drill (drawing numbers from a cup). | 5 minutes daily | Looking at your picking hand instead of keeping eyes on the fretboard. |
| Root Note Placement | Pluck the root string before strumming any open chord shape. | 5 minutes daily | Strumming all six strings for chords that require muting the 6th string. |
The Music Theory Behind the Tuning (EADGBE)
Have you ever wondered why the guitar is tuned to E-A-D-G-B-E in the first place? Why not tune it alphabetically (A-B-C-D-E-F) or in perfect symmetry? The answer lies in a mix of physics, human anatomy, and music history.
The intervals between standard guitar strings are mostly perfect fourths. A perfect fourth is an interval of five semitones (or five frets).
- From E to A is a perfect fourth.
- From A to D is a perfect fourth.
- From D to G is a perfect fourth.
- From B to E is a perfect fourth.
However, the interval between G and B is a major third (four semitones).
If the guitar were tuned entirely in perfect fourths (E-A-D-G-C-F), playing standard chord shapes would be incredibly difficult. Your fingers would have to stretch across awkward distances just to play a simple major or minor triad.
By introducing that single major third interval between the G and B strings, the physical layout of the fretboard becomes highly ergonomic. It allows you to easily press down common shapes like the barre chord, which runs across all six strings with a single flat finger.
Applying String Names to Chords and Tabs
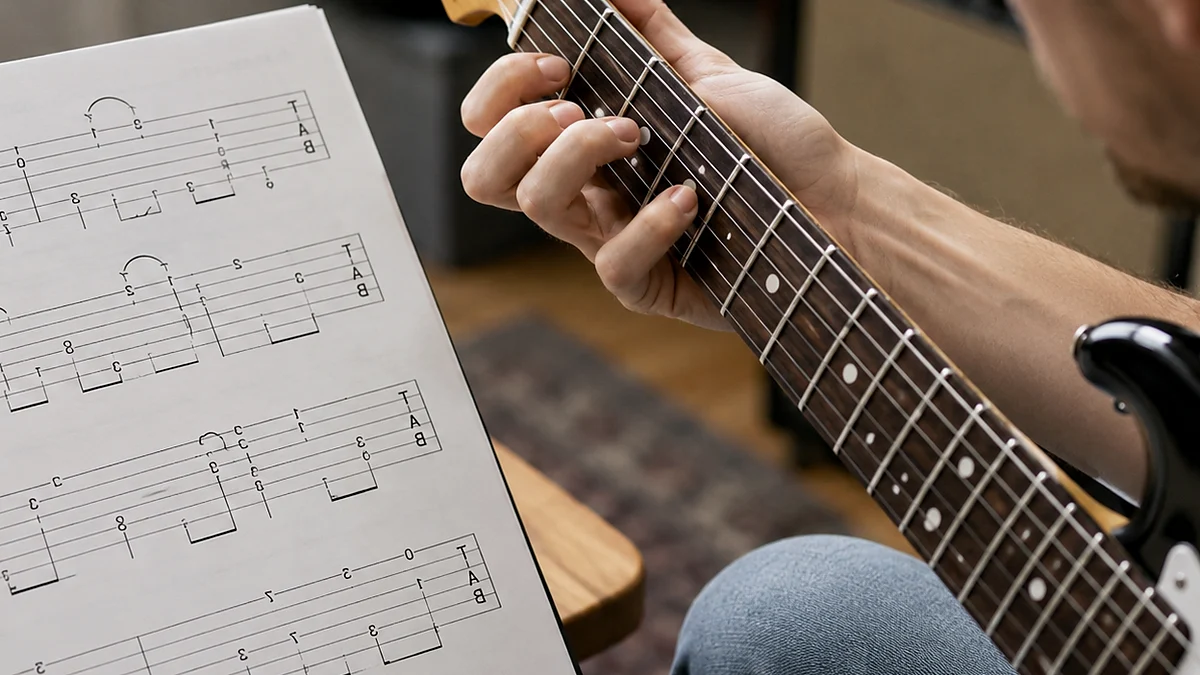
Once you have memorized the open string names, you will immediately see how they apply to reading music. Guitar music is rarely written on a standard five-line musical staff for beginners. Instead, we use guitar tablature (TAB) and chord diagrams.
Reading Guitar Tablature (TAB)
A guitar tab consists of six horizontal lines. Each line represents one of the strings on your guitar.
E |-----------------------------------| (1st String - Thinnest)
B |-----------------------------------| (2nd String)
G |-----------------------------------| (3rd String)
D |-----------------------------------| (4th String)
A |-----------------------------------| (5th String)
E |-----------------------------------| (6th String - Thickest)
Notice that the layout of a tab is a visual inversion of how the guitar when you look down at your lap. The top line of the tab represents the 1st string (High E), which is physically closest to the floor. The bottom line of the tab represents the 6th string (Low E), which is physically closest to your face.
Knowing your string names allows you to translate these lines to your instrument without hesitation. When a number "3" on the second line from the bottom, you know instantly to place your finger on the 3rd fret of the 5th string (A).
Navigating Chord Diagrams
Chord diagrams are vertical representations of the guitar fretboard. The vertical lines represent the strings, running from left (6th string, Low E) to right (1st string, High E). The horizontal lines represent the frets.
At the top of the diagram, you will often see "X" or "O" marks above the strings.
- An O means you play the string open (without pressing any frets).
- An X means you do not play that string at all.
For example, when looking at a D major chord diagram, you will see an "X" over the 6th and 5th strings. This tells you to start your strum on the 4th string (D). If you do not know your string names, you might accidentally strum the low E and A strings, adding muddy, unwanted bass frequencies to your clean D major chord. Knowing your strings ensures your chords sound clear, resonant, and tonally accurate.
Taking Your Practice to the Next Level
Memorizing the names of the six guitar strings is a small investment of time that pays strong dividends throughout your musical life. By using simple mnemonics, practicing physical touch drills, and integrating the Chords.me Guitar Tuner into your daily setup routine, you will Learn This fundamental step in just a few days. Keep your guitar in tune, practice your string recall daily, and enjoy the confidence that comes with truly knowing your instrument.
Related Chords.me Guides
For the next step, read CAGED System Guitar Explained: Complete Beginner’s Guide to Fretboard Mast, Chromatic Tuner Guitar Guide: How to Tune Accurately as a Beginner, and Major vs Minor Keys: Guitar Guide before moving on. You can also test the same idea in another key and check each string with the guitar tuner while practicing this lesson.
Practice This With Chords.me
Use the Chord Transposer to test the idea in another key, then practice the same example slowly. Focus on clean notes and steady timing before increasing speed.
Frequently Asked Questions
What is 6 Guitar String Names?
6 Guitar String Names is a guitar-learning topic that helps players build a clearer connection between technique, sound, and practice. For beginners, the most useful approach is to learn the basic idea first, then apply it slowly on a tuned guitar.
Is 6 guitar string names hard for beginners?
It can feel difficult at first, but it becomes manageable when you break it into small steps. Focus on clean notes, relaxed hands, and short practice sessions instead of trying to master everything in one day.
What should I practice first for 6 guitar string names?
Start with the simplest version of the idea: one chord, one pattern, one short exercise, or one small section of the fretboard. Once that feels stable, add timing, transitions, or a second example.
What common mistakes should I avoid?
Avoid rushing, pressing harder than necessary, ignoring tuning, and practicing mistakes at full speed. Slow, accurate repetitions usually fix beginner problems faster than long unfocused practice sessions.
Which Chords.me tool helps with this topic?
The Guitar Tuner is the best supporting tool here because it helps with checking pitch, tuning stability, and practice accuracy. Use it before or during practice so the article’s examples translate into real playing more easily.
About the Contributor
Chords.me Tuning & Setup Desk Tuning, strings, and setup contributor
A brand contributor profile for Chords.me tuning and setup content. This desk focuses on tuning accuracy, string choice, fret buzz, intonation, action, and maintenance topics for everyday players. Content is checked for practical clarity, beginner readability, and accurate links to relevant Chords.me tools.