Hammer Ons Guitar Guide: Learn the Essential Legato Technique
Hammer Ons Guitar Guide: Learn the Essential Legato Technique: clear guitar guide with practical examples, common mistakes, and Chords.me practice tools.
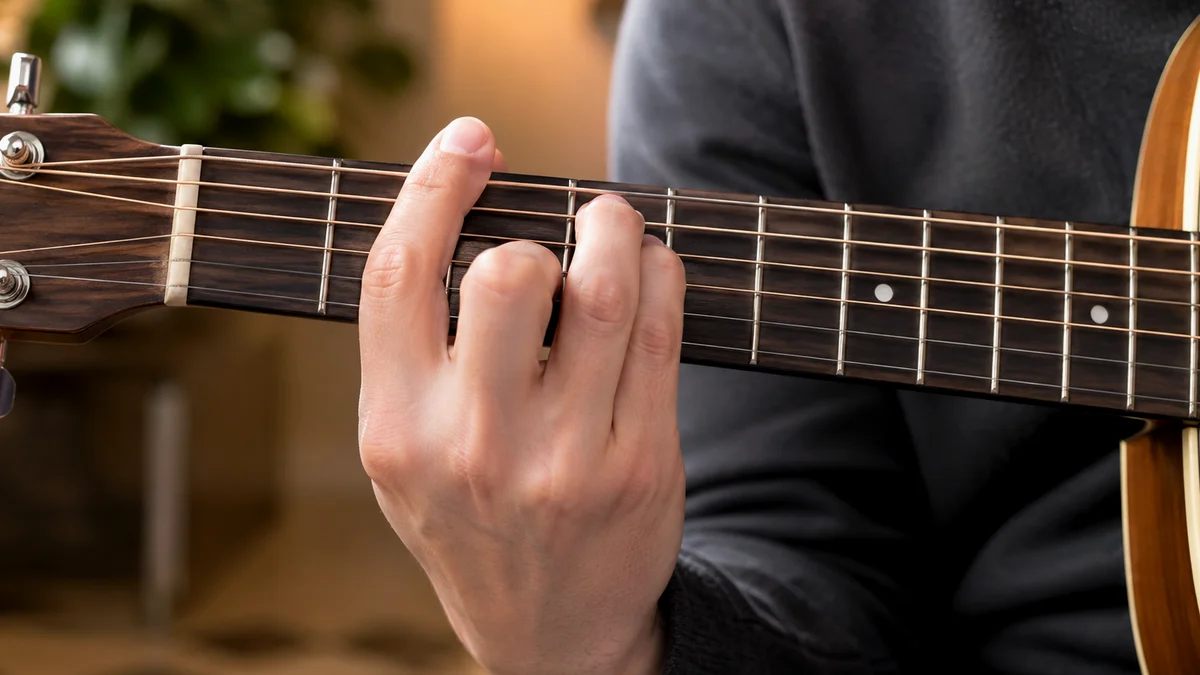
When you first start playing guitar, every note you play is usually accompanied by a stroke of your pick. While this alternate picking approach is essential for rhythm and precision, it can make your lead lines sound rigid, mechanical, and disconnected. To make your guitar playing sound fluid, expressive, and vocal, you must learn to connect your notes.
In the world of guitar, this smooth, connected style is known as legato. The absolute foundation of legato playing is the hammer on.

Learning how to execute hammer ons correctly transforms your playing. It allows you to play faster passages with less effort from your picking hand, improves your fretting hand strength, and adds a professional, flowing quality to your solos and chord transitions. This guide will walk you through the mechanics of the hammer on, provide step-by-step practice routines, highlight common pitfalls to avoid, and show you how to integrate this technique into your daily playing.
What is a Hammer On?
Before physical practice begins, you need to understand the physical mechanics of the instrument and how this technique alters the vibration of your strings.
Definition: What is a Hammer On? A hammer on is a guitar technique where you pluck a note on a specific fret and then use a finger on your fretting hand to firmly strike a higher fret on the same string without plucking the string again. The force of your finger landing on the fretboard causes the string to vibrate at a new, higher pitch, sustaining the sound of the original note while transitioning smoothly to the next.
In standard guitar tablature, a hammer on is represented by the letter H or by a curved line (called a slur) connecting two notes. For example, a transition from the 5th fret to the 7th fret using a hammer on would look like this:
E|-----------------|
B|-----------------|
G|---5--H--7-------|
D|-----------------|
A|-----------------|
E|-----------------|
When you perform this action, your picking hand only works once. The second note is produced entirely by the kinetic energy of your fretting finger. This requires a unique combination of finger independence, accuracy, and strength.
Is Hammer Ons Guitar Good for Beginners?
Many beginner guitarists wonder if they should tackle legato techniques early in their musical learning process or wait until they have mastered basic chords and scales. The answer is clear: learning hammer ons is highly beneficial for beginners.
First, it forces you to develop correct fretting hand posture. To execute a clean hammer on, you cannot rely on lazy hand positions. Your fingers must be curved, and you must use the very tips of your fingers. Practicing this technique early on prevents you from developing bad habits that can take years to unlearn.
Second, it builds finger strength and dexterity. Beginners often struggle with a weak ring finger and pinky finger. By practicing targeted hammer on drills, you isolate these weaker fingers, forcing them to build the muscle memory and strength required for advanced lead guitar technique.
Finally, it makes playing more enjoyable. Even simple chord changes and pentatonic scales sound more musical when you insert a few well-placed hammer ons. It breaks up the monotony of constant picking and gives you an immediate taste of how real-world guitar solos are constructed.
How to Learn Hammer Ons Guitar Step by Step
For the next beginner step, compare this lesson with How to Learn Guitar at Home so each practice topic supports the next one.
To learn how to execute this technique without frustration, you must break down the physical movement into deliberate phases. Do not try to play fast immediately. Focus on the mechanics of your hand, wrist, and fingers.
Step 1: Establish Your Hand Position and Anchor Note
Choose a comfortable spot on the fretboard. The middle of the neck is ideal because the frets are closer together than they are at the headstock, but not as cramped as they are near the body. The 5th fret on the G string (3rd string) is an excellent starting point.
Place your index finger on the 5th fret. Ensure your thumb is positioned flat against the back of the neck, roughly opposite your middle finger. This thumb placement acts as a crucial fulcrum, providing the counter-pressure your fingers need to strike the fretboard with force. Your fingers should be curved, resembling a claw, with your knuckles pointing away from the fretboard.
Step 2: Play the Initial Note with a Clean Pick Strike
Pluck the G string with your pick hand. Ensure this first note rings out clearly and sustains. If the note is buzzy or muffled, adjust your index finger so it is resting just behind the 5th fret wire, not directly on top of it or too far back toward the 4th fret.
Step 3: Align and Prepare Your Hammering Finger
While the 5th fret note is sustaining, hover your ring finger (3rd finger) approximately one-half inch directly above the 7th fret on the same string. Keeping your hammering finger too close to the string limits your leverage, while hovering too far away compromises your accuracy. Keep the finger curved and relaxed.
Step 4: Execute the Strike with Speed and Precision
In one quick, decisive motion, bring the tip of your ring finger down onto the 7th fret.
The key to a successful hammer on is speed, not raw force. Think of your finger as a small drumstick striking a drumhead. If you press down slowly, your finger pad will muffle the vibrating string, killing the sustain. If you strike quickly, the string is instantly pinned against the fret wire, allowing the new pitch to ring out clearly.
Step 5: Maintain Firm Pressure to Sustain the Note
Once your ring finger makes contact with the fretboard, do not let it bounce off or lose pressure. Keep it pressed firmly against the wood just behind the 7th fret wire. If you release the pressure even slightly, the note will die out prematurely. Your index finger should remain resting on the 5th fret throughout this process.

Essential Hammer On Exercises for Daily Practice
To turn this physical motion into muscle memory, you need systematic exercises. Add these drills to your daily warm-up routine. Use a metronome to ensure your timing remains perfectly consistent. If you need to establish a steady practice tempo, you can use the Chords.me Tap BPM finder to quickly set your target speed.
Exercise 1: The Index-to-Middle Finger Drill (1-to-2)
This exercise focuses on your strongest fingers to help you get used to the basic mechanics of the movement.
- Place your index finger on the 5th fret of the B string (2nd string).
- Pick the note.
- Hammer on to the 6th fret with your middle finger.
- Hold the note for two beats, then release and repeat.
Repeat this process ten times, focusing on achieving an equal volume level between the picked note and the hammered note.
Exercise 2: The Index-to-Ring Finger Drill (1-to-3)
This is the most common hammer on interval in rock, blues, and pop music, as it spans a whole step (two frets).
E|-----------------------------------------|
B|-----------------------------------------|
G|---------5-H-7---------5-H-7---------5---|
D|---5-H-7---------5-H-7---------5-H-7-----|
A|-----------------------------------------|
E|-----------------------------------------|- Start on the low E string. Play the 5th fret with your index finger, then hammer on to the 7th fret with your ring finger.
- Move to the A string and repeat the pattern.
- Continue this pattern across all six strings, moving from the lowest string to the highest string.
- Keep your tempo slow and steady.
Exercise 3: The Pinky Strength Builder (1-to-4)
The pinky finger is naturally the weakest finger on your fretting hand. This exercise is challenging, but it is essential for developing a complete lead guitar technique.
- Place your index finger on the 5th fret of the high E string.
- Pick the note.
- Hammer on to the 8th fret using your pinky finger.
- Because the pinky has less natural strength, you must focus on extreme accuracy. Ensure the tip of your pinky lands perpendicular to the fretboard.
Common Hammer Ons Guitar Mistakes Beginners Make
When learning how to learn hammer ons guitar step by step, it is easy to fall into bad physical habits. Recognizing these errors early will save you hours of corrective practice.
Mistake 1: The "Lazy" or Slow Strike
The most common mistake is bringing the hammering finger down too slowly. If your finger moves slowly, the soft pad of your fingertip will touch the vibrating string before the string makes contact with the metal fret wire. This absorbs the energy of the string, resulting in a dull, muffled thud instead of a clear note. Remember: the movement must be sudden and quick, like a snap.
Mistake 2: Striking with the Flat Pad of the Finger
If you flatten your fingers and strike the string with the soft, fleshy pad of your finger, you will muffle adjacent strings and lose accuracy. You must curve your fingers so that only the very tip of your finger—just below the fingernail—makes contact with the string. Keep your fingernails trimmed short to facilitate this correct hand posture.
Mistake 3: Pulling or Bending the String on Impact
When trying to generate force, beginners often accidentally pull the string downward toward the floor when their finger lands. This bends the string, causing the hammered note to sound sharp and out of tune. Ensure your finger lands directly on top of the string, pushing straight down into the fretboard without any lateral movement.
Mistake 4: Lifting the Anchor Finger Too Early
When you hammer on from the 5th fret to the 7th fret, your index finger (on the 5th fret) must remain in place. If you lift your index finger the moment your ring finger strikes, you lose the solid hand foundation and tension required for a clean transition. Keep your anchor finger planted.
| Skill / Focus Area | Practice Method | Time Needed | Common Mistake |
|---|---|---|---|
| Finger Independence | Alternate between index-to-ring and index-to-pinky drills on a single string. | 5 minutes daily | Lifting the index finger (anchor) prematurely. |
| Strike Velocity | Practice slow-tempo hammer ons, focusing entirely on a quick, snappy finger drop. | 5 minutes daily | Pressing down slowly, which muffles the string. |
| Pitch Accuracy | Play along with a tuner or drone note to ensure your hammered notes are perfectly in tune. | 3 minutes daily | Pulling the string sideways, causing the note to go sharp. |
| String-to-String Cleanliness | Perform ascending scale runs across all six strings. | 7 minutes daily | Accidentally striking adjacent strings with flat fingers. |
Integrating Hammer Ons into Real Songs and Lead Guitar
Once you can play basic exercises cleanly, it is time to apply this technique to real music. Hammer ons are not just for flashy solos; they are used constantly in rhythm guitar, chord embellishments, and acoustic fingerstyle patterns.
Acoustic Chord Embellishments
You can use hammer ons to add movement to static open chords. A classic example is playing an open C Major chord and hammering on your middle finger.
To try this, form an open C Major chord, but leave your middle finger hovering off the fretboard. Strum the chord (leaving the D string open), and then immediately hammer your middle finger down onto the 2nd fret of the D string. This simple movement adds a beautiful, folk-style embellishment used by countless songwriters.
Open C Major Embellishment:
E|---0---|
B|---1---|
G|---0---|
D|---0-H-2---| <-- Hammer on middle finger here while strumming
A|---3---|
E|-------|
You can do the same with an Asus2 to A minor transition, or an open G Major chord by hammering onto the 2nd fret of the A string.
Practicing with Chord Sheets
When you are learning to integrate these embellishments into your favorite songs, having a clear, well-structured chord sheet is essential. If you are practicing transitions between open chords and want to map out where your hammer ons go, you can use the Chords.me Chord Sheet PDF Generator. This tool allows you to create clean, easy-to-read chord sheets that you can print out or keep on your tablet. You can write in your hammer on indicators (like "Dsus2 H D") directly onto your custom sheets, keeping your practice sessions organized and highly productive.
Refining Your Tone and Dynamics
As you progress, your goal should be to make your hammer ons sound completely smooth. In a perfect legato run, the listener should not be able to easily tell the difference in volume or tone between a picked note and a hammered note.
Balancing Volume
Naturally, a picked note will be louder than a hammered note because the pick transfers more energy to the string than a single finger strike. To balance your dynamics, you must do two things:
- Soften your pick attack slightly. Do not dig your pick deep into the strings.
- Increase the velocity of your hammering finger.
By meeting in the middle, you create an even, fluid stream of notes where the volume remains consistent.
The Role of Guitar Setup
Your instrument's setup plays a significant role in how easy it is to play hammer ons. If your guitar's "action" (the height of the strings above the fretboard) is too high, you will have to exert an immense amount of force to get a clean hammer on. If you find yourself struggling despite practicing correct technique, take your guitar to a local technician and ask them to check the action. A lower, professionally adjusted action makes legato playing significantly easier.
With consistent, daily practice, the physical movements required for hammer ons will soon become second nature. Start slow, focus on the precision and speed of your finger strikes, and keep your fingers curved. By incorporating these exercises into your warm-up routine and utilizing tools like the Chords.me Chord Sheet PDF Generator to organize your repertoire, you will quickly develop the finger strength and control needed to take your guitar playing to the next level. Keep your practice focused, protect your wrist posture, and enjoy the smooth, expressive sounds of legato playing.
Related Chords.me Guides
For the next step, read Major vs Minor Keys: Guitar Guide, Blues Scale Guitar Guide: Beginner Practice Guide, and Major Scale Guitar Guide: Beginner Practice Guide before moving on. You can also test the same idea in another key and keep practice timing steady with the tap tempo tool while practicing this lesson.
Practice This With Chords.me
Use the Chord Transposer to test the idea in another key, then practice the same example slowly. Focus on clean notes and steady timing before increasing speed.
Frequently Asked Questions
What is Hammer Ons Guitar?
Hammer Ons Guitar is a guitar-learning topic that helps players build a clearer connection between technique, sound, and practice. For beginners, the most useful approach is to learn the basic idea first, then apply it slowly on a tuned guitar.
Is hammer ons guitar hard for beginners?
It can feel difficult at first, but it becomes manageable when you break it into small steps. Focus on clean notes, relaxed hands, and short practice sessions instead of trying to master everything in one day.
What should I practice first for hammer ons guitar?
Start with the simplest version of the idea: one chord, one pattern, one short exercise, or one small section of the fretboard. Once that feels stable, add timing, transitions, or a second example.
What common mistakes should I avoid?
Avoid rushing, pressing harder than necessary, ignoring tuning, and practicing mistakes at full speed. Slow, accurate repetitions usually fix beginner problems faster than long unfocused practice sessions.
Which Chords.me tool helps with this topic?
The Guitar Tuner is the best supporting tool here because it helps with checking pitch, tuning stability, and practice accuracy. Use it before or during practice so the article’s examples translate into real playing more easily.
About the Contributor
Chords.me Tuning & Setup Desk Tuning, strings, and setup contributor
A brand contributor profile for Chords.me tuning and setup content. This desk focuses on tuning accuracy, string choice, fret buzz, intonation, action, and maintenance topics for everyday players. Content is checked for practical clarity, beginner readability, and accurate links to relevant Chords.me tools.