BPM Finder for Musicians: Beginner Guide
BPM Finder for Musicians: Beginner Guide: clear guitar guide with practical examples, common mistakes, and Chords.me practice tools.
Every guitar player has experienced the frustration of uneven timing. You practice a chord progression or a riff in your room, and it sounds great. But the moment you try to play along with a backing track, a drummer, or another guitarist, everything seems to fall apart. You find yourself rushing through the easy parts and dragging through the difficult chord changes.
The practical way to overcoming this hurdle does not lie in practicing longer; it lies in practicing with rhythmic precision. To do that, you must understand the heartbeat of the music you are playing. This is where a BPM finder becomes an essential tool for your musical development.
What is a BPM finder? A BPM finder (often called a tap tempo tool) is a digital utility that calculates the tempo of a piece of music in Beats Per Minute (BPM). By tapping a key, mouse, or screen in time with a song's pulse, the tool measures the interval between your taps and displays the exact numerical speed of the music.
What is a BPM Finder and How Does It Work?
To understand how a BPM finder works, we must first define what BPM actually means. BPM stands for Beats Per Minute. It is the universal mathematical measurement of musical tempo. Just as a speedometer measures how fast a car travels in miles or kilometers per hour, BPM measures how many beats occur in one minute of music.
Historically, composers used Italian terms like Andante (at a walking pace) or Allegro (fast and lively) to describe tempo. While these terms convey a general mood, they lack mathematical precision. Modern music production and practice require exact numbers. A song at 120 BPM has exactly 120 beats per minute, meaning there are two beats every single second. A song at 60 BPM has exactly one beat per second.
A BPM finder simplifies the process of identifying this number. Instead of staring at a clock and counting drum beats for sixty seconds, you use a tap tempo interface. When you tap along with the music, the software measures the milliseconds between each tap. It then runs a simple calculation to convert those intervals into a stable BPM reading.
Is a BPM Finder Good for Beginners?
Beginners often ask if using a BPM finder is necessary when they are just starting out. The answer is yes. When you are learning your first chords, your brain is overwhelmed with physical tasks: fretting the strings, avoiding fret buzz, and coordinating your strumming hand. Because your brain is working so hard on the mechanics, your internal sense of time becomes distorted. Slow sections feel fast, and fast sections feel slow.
A BPM finder acts as an objective reference point. It bridges the gap between what you hear and what you play. Instead of guessing how fast a song is, you can find its exact tempo in seconds. This allows you to set up your practice environment systematically, ensuring you are not trying to practice a song at a speed your hands cannot yet handle.
How to Learn BPM Finder Step by Step
Using a BPM finder is a physical skill that requires coordination between your ears, your brain, and your hand. If you tap erratically, the tool will give you an inaccurate reading.
Here is how to learn to use a BPM finder step by step:
Step 1: Isolate the Primary Pulse
Before you touch any tool, listen to the song you want to analyze. Do not focus on the vocals, the guitar solo, or the keyboard fills. These elements are often syncopated, meaning they play around the beat rather than directly on it. Instead, listen to the rhythm section. In most modern music, the bass drum (kick) and the snare drum define the pulse. The bass drum usually lands on beats one and three, while the snare drum hits on beats two and four.
Step 2: Establish a Physical Connection
Once you hear the pulse, start moving your body to it. Tap your foot on the floor, nod your head, or pat your hand on your leg. Physical movement is crucial because it engages your motor cortex, helping your brain lock into the rhythm. Do this for at least four to eight measures until your movement feels completely natural and effortless.
Step 3: Open Your Tap Tempo Tool
Open the Chords.me tap tempo finder on your computer or phone. Position your finger over the tap button or your hand over the spacebar. Keep your wrist relaxed. Tension in your hand will cause you to tap slightly ahead of or behind the actual beat, which skewing your results.
Step 4: Tap with Consistency
Begin tapping the button or key in perfect synchronization with your foot taps. Do not stop after two or three taps. A good BPM finder uses an averaging algorithm to smooth out minor human errors. For the most accurate reading, tap consistently for at least 10 to 12 beats.
Step 5: Read and Verify the Output
Look at the displayed number. If your tapping was steady, the number should stabilize and stop fluctuating wildly. To verify the result, keep tapping for another few seconds. If the number remains within one or two BPM of your initial reading, you have found the correct tempo.
Why Guitarists Need a BPM Finder
For a guitarist, a BPM finder is not just a novelty tool; it is a foundational component of effective timing practice. There is a distinct difference between general timing practice and structured metronome practice, and a BPM finder is the bridge between the two.
Timing Practice vs. Metronome Practice
Timing practice is the broad act of developing your internal clock. It involves learning to feel subdivisions (like eighth notes and sixteenth notes) and staying relaxed while playing. Metronome practice is the highly disciplined application of this skill. It requires you to play along with a clicking sound at a specific tempo.
Without a BPM finder, metronome practice often feels like guesswork. If you want to practice a specific riff from a song, you might set your metronome to a random speed that feels "about right." If that speed is too fast, you will practice mistakes and build tension. If it is too slow, you will not challenge your muscle memory. By using a BPM finder guitar players can identify the exact tempo of the original recording, allowing them to scale that number down to a manageable starting point.
The Impact on Technique, Tone, and Accuracy
Your guitar technique is directly linked to tempo. Every physical movement you make on the fretboard takes a specific amount of time. If you try to play a passage faster than your current synchronization level allows, your movements will become frantic.
- Technique: When you play too fast, your fingers fly too far away from the fretboard, and your picking hand loses its economy of motion. Finding the target BPM lets you slow the track down by 20% or 30%, giving your brain the processing time it needs to optimize your finger movements.
- Tone: Clean tone relies on the precise synchronization of your fretting hand and your picking hand. If your pick strikes the string before your fretting finger has fully pressed it against the fret, you will get a muted, buzzy sound. Practicing at a verified, slow BPM ensures that your hands coordinate perfectly, resulting in a clear, ringing tone.
- Accuracy: Accuracy is built through repetition. If you practice a riff incorrectly ten times, you are training your muscles to play it incorrectly. By using a BPM finder to establish your current threshold, you can practice at a speed where you can play the riff perfectly ten times in a row.
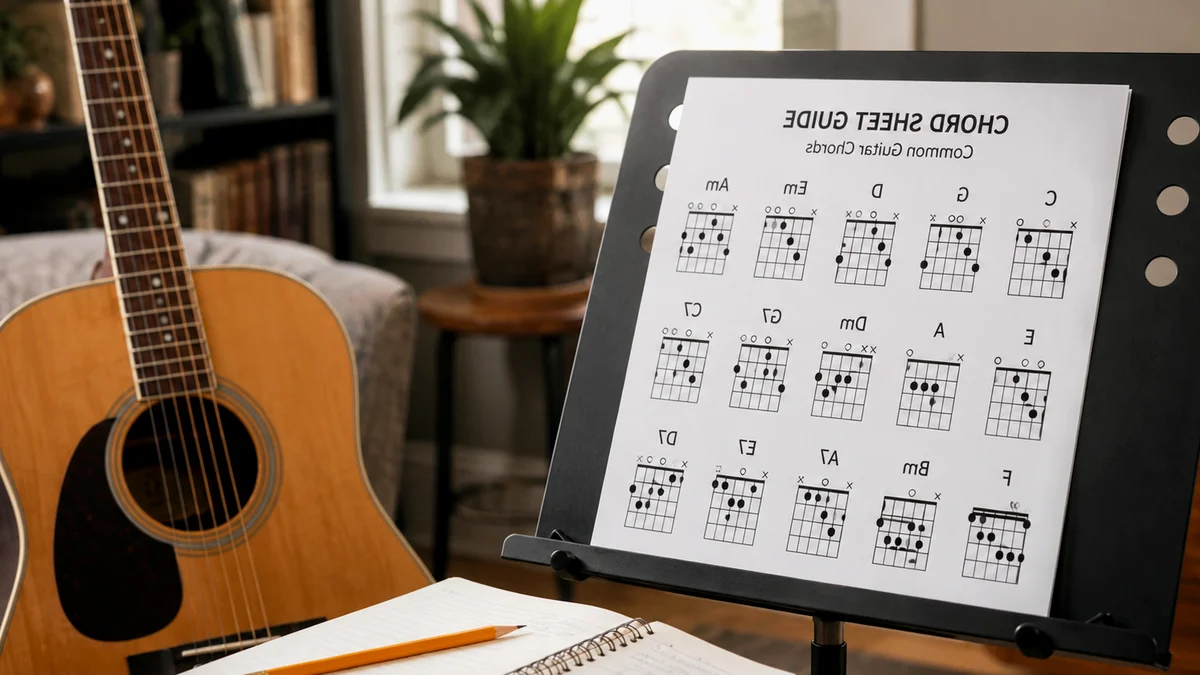
Practical Guitar Exercises Using a BPM Finder
To get the most out of your rhythm tools, you must integrate them into your daily practice routine. Here are three practical exercises designed for beginners to develop timing, speed, and accuracy.
Exercise 1: The Step-Down Song Method
This exercise helps you learn new songs without the frustration of falling behind the recording.
- Select a song you want to learn that has a prominent drum beat.
- Use the Chords.me tap tempo tool to find the song's native BPM. Let's assume the song is "Redemption Song" by Bob Marley, which sits around 116 BPM.
- Calculate 70% of that tempo (approximately 80 BPM).
- Set your metronome to 80 BPM and practice the chord transitions. At this slower speed, focus on making your chord changes clean and ensuring every note rings out clearly.
- Once you can play the progression perfectly three times in a row at 80 BPM, increase the metronome by 5 BPM.
- Repeat this process until you reach the song's original tempo of 116 BPM.
Exercise 2: The 5-BPM Speed Ladder
This exercise is made to build your physical picking speed and fretting hand coordination using a simple scale or riff.
- Choose a simple four-note pattern, such as the first four notes of the minor pentatonic scale.
- Use a metronome to find your "comfort floor"—the speed at which you can play the pattern perfectly with zero tension. Let's say this is 80 BPM.
- Play the pattern continuously for two minutes at 80 BPM, focusing entirely on keeping your hands relaxed and your pick strokes small.
- Increase the tempo to 85 BPM. Play for another two minutes.
- Increase the tempo to 90 BPM. If you notice your shoulders tensing up or your pick missing strings, stop. This tension indicates you have hit your current limit.
- Use the tap tempo tool to tap along with your playing when you feel you are at your absolute limit. Note this number down in a practice journal. This is your baseline. Your goal for the next week is to push this baseline up by just 5 BPM.
Exercise 3: The Groove Matcher
This exercise trains your internal clock so you do not rely solely on the visual or auditory clicks of a metronome.
- Find a drum loop online or play a song you know well.
- Use the BPM finder to determine the tempo of the loop.
- Set your metronome to that exact BPM, but configure it so that it only clicks on beat one of every measure (this is called "accenting the one").
- Strum a simple G major chord on every beat (one, two, three, four), but rely on your internal timing to stay aligned with the metronome click that only happens on beat one.
- If you find yourself striking the chord before or after the click when beat one returns, you are either rushing or dragging. Adjust your internal pace until you land perfectly on the click every single time.
BPM Finder Mistakes Beginners Make
While using a BPM finder is straightforward, beginners frequently fall into several common traps that lead to inaccurate readings and frustrated practice sessions. Understanding these mistakes will help you avoid them.
Mistake 1: Tapping the Melody Instead of the Pulse
The most common error is tapping along with the rhythm of the lyrics or the lead guitar line. Vocal lines are made to be expressive and often float over the beat, speeding up and slowing down for emotional effect. If you tap along with the words of a song, your BPM reading will jump around erratically. Always focus your ears on the rhythm section—specifically the bass guitar, kick drum, or snare drum—to find the steady, unyielding pulse of the track.
Mistake 2: Tapping Too Few Times
Many beginners tap the screen four times and assume the reading is correct. Four taps only provide three intervals of measurement, which is not enough data for an accurate average. If your first tap was slightly late and your third tap was slightly early, your reading could be off by 10 BPM or more. For a reliable reading, tap consistently for at least 12 to 16 beats. This gives the algorithm enough data to filter out human variance and calculate a true average.
Mistake 3: Chasing the Display
When beginners use a tap tempo tool, they often watch the numbers change on the screen while they are tapping. If they see the number jump from 118 to 122, they try to adjust their physical tapping speed to "force" the number back down. This creates a feedback loop of constant correction, resulting in a highly inaccurate reading. When using a BPM finder, close your eyes or look away from the screen. Trust your ears and your physical body movement. Only look at the screen after you have tapped steadily for several measures.
Mistake 4: Confusing Halftime and Doubletime
Sometimes, a beginner will tap along to a song and get a reading of 70 BPM, while another musician says the song is 140 BPM. Both are technically correct, but they are perceiving the pulse differently. This is the difference between halftime and doubletime.
If you tap on every single beat, you might get 140 BPM. If you only tap on beats one and three, you will get 70 BPM. As a rule of thumb for guitar practice, try to tap at a rate that feels like a natural walking pace. If your tapping feels frantic and incredibly fast, you are likely tapping in doubletime. If it feels incredibly slow and sparse, you are likely tapping in halftime.
Skill & Practice Roadmap
To help you organize your rhythm practice, use the following roadmap. It outlines the skills you need to develop, the best practice methods, the time required, and the common pitfalls to watch out for.
| Skill | Practice Method | Time Needed | Common Mistake |
|---|---|---|---|
| Tempo Identification | Listen to a song, tap your foot, and use the Chords.me tap tempo tool to find the exact BPM. | 5 minutes per session | Tapping to the vocal melody instead of the drum beat. |
| Metronome Alignment | Set your metronome to the found BPM and play single downstrums on every beat. | 10 minutes daily | Rushing ahead of the click due to physical tension. |
| Subdivision Control | Strum quarter notes, then eighth notes, then sixteenth notes at a steady 80 BPM. | 10 minutes daily | Speeding up the overall tempo when switching to faster notes. |
| Speed Building | Use the 5-BPM Speed Ladder to gradually increase the speed of a scale or riff. | 15 minutes daily | Increasing the speed before the current tempo is completely clean. |
| Groove Retention | Practice playing with a metronome that only clicks on the first beat of each measure. | 5 minutes daily | Losing the beat entirely during the silent counts. |
Applying Rhythm Tools to Your Daily Routine
Developing a great sense of rhythm does not happen overnight, but it is a skill that any guitarist can master with the right approach. By integrating a BPM finder into your practice routine, you take control of your learning process. You no longer have to guess if you are playing a song at the right speed, nor do you have to wonder why a particular riff feels so difficult to execute.
Whenever you sit down to practice, make it a habit to identify the tempo of the material you are working on. Use the Chords.me tap tempo tool to find your baseline, set your metronome accordingly, and practice with deliberate focus. Over time, this disciplined approach will improve your playing. Your chord changes will become smoother, your solos will lock perfectly with the rhythm section, and your overall performance will carry the confident, steady groove of a seasoned musician. Keep your practice focused, keep your tempo steady, and let the tools support your learning process toward rhythmic mastery.
Related Chords.me Guides
For the next step, read Blues Scale Guitar Guide: Beginner Practice Guide, Major Scale Guitar Guide: Beginner Practice Guide, and CAGED System Guitar Explained: Complete Beginner’s Guide to Fretboard Mast before moving on. You can also test the same idea in another key and keep practice timing steady with the tap tempo tool while practicing this lesson.
Practice This With Chords.me
Use the Tap Tempo to keep the exercise slow, steady, and repeatable. Focus on clean notes and steady timing before increasing speed.
Frequently Asked Questions
What is BPM Finder for Musicians?
BPM Finder for Musicians is a guitar-learning topic that helps players build a clearer connection between technique, sound, and practice. For beginners, the most useful approach is to learn the basic idea first, then apply it slowly on a tuned guitar.
Is bpm finder for musicians hard for beginners?
It can feel difficult at first, but it becomes manageable when you break it into small steps. Focus on clean notes, relaxed hands, and short practice sessions instead of trying to master everything in one day.
What should I practice first for bpm finder for musicians?
Start with the simplest version of the idea: one chord, one pattern, one short exercise, or one small section of the fretboard. Once that feels stable, add timing, transitions, or a second example.
What common mistakes should I avoid?
Avoid rushing, pressing harder than necessary, ignoring tuning, and practicing mistakes at full speed. Slow, accurate repetitions usually fix beginner problems faster than long unfocused practice sessions.
Which Chords.me tool helps with this topic?
The Guitar Tuner is the best supporting tool here because it helps with checking pitch, tuning stability, and practice accuracy. Use it before or during practice so the article’s examples translate into real playing more easily.
About the Contributor
Chords.me Practice Tools Desk Practice workflow and music tools contributor
A brand contributor profile for Chords.me practice-tool guides. This desk focuses on timing, BPM, chord sheets, transposition, capo use, and ways to turn practice notes into usable playing routines. Content is checked for practical clarity, beginner readability, and accurate links to relevant Chords.me tools.