How to Tune a Guitar by Ear
How to Tune a Guitar by Ear: Learn a manual/aural method to tune a guitar without an electronic tuner

Imagine you are at a campfire, at a friend’s house, or at a gig, and someone hands you an acoustic guitar. You pluck the strings, and the sound is a dissonant clash of frequencies. You reach into your pocket for your phone, but the battery is dead. You look around for a clip-on tuner, but there is none to be found.
In this moment, a common question arises: can you tune a guitar without an app?
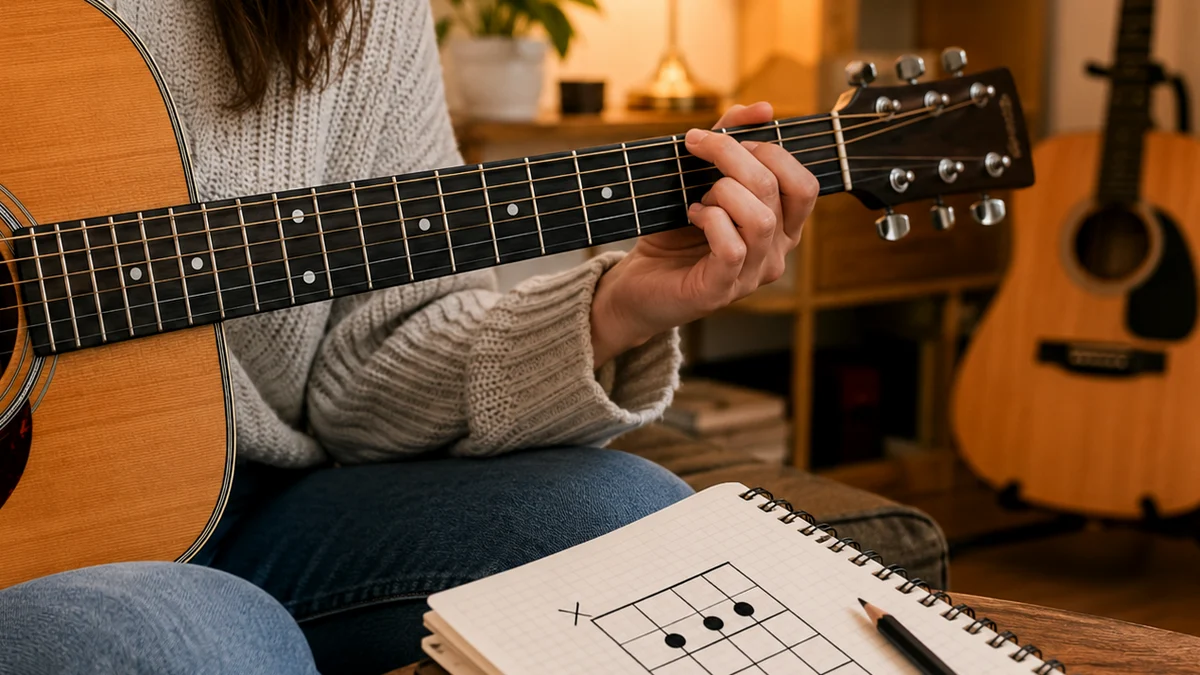
The answer is yes. For generations of musicians, tuning by ear was not a backup plan; it was the primary way to prepare an instrument for performance. Learning how to tune a guitar by ear step by step is one of the most empowering skills you can develop as a beginner. It transitions you from a player who relies on digital screens to a musician who truly understands the physics and voice of their instrument.
This guide will teach you how to tune a guitar without a tuner, focusing on the classic 5th fret method, the science of pitch matching, and how to use your natural musical intuition to get your guitar sounding sweet and harmonious.
What is Relative Tuning? Relative tuning is the process of tuning a guitar to itself. Instead of matching each string to an external electronic frequency (such as an app or digital tuner), you use one string as a reference point and tune the remaining strings in relation to it. Even if the entire instrument is slightly sharp or flat compared to concert pitch, the strings will be in perfect harmony with each other, allowing you to play chords and melodies that sound completely in tune.
Why Ear Tuning is Important for Guitarists
In modern music education, it is easy to become dependent on visual aids. We watch a needle on a screen or wait for a little LED light to turn green. While digital tools are incredibly convenient, they can create a barrier between your ears and your instrument.
So, why is ear tuning important for guitarists who already have access to smartphones?
First, aural guitar tuning builds your relative pitch. This is the ability to identify the interval, or distance, between two musical notes. When you tune by ear, you force your brain to analyze whether a note is too high (sharp) or too low (flat) relative to another note. Over time, this training makes you a better listener. You will start to notice when you bend a string slightly out of tune during a solo, or when your vocal harmonies are not quite blending with the band.
Second, it connects you to the physical reality of string vibration. You begin to feel how tension changes the pitch. You learn how temperature and humidity affect your instrument.
Finally, it makes you self-reliant. A guitarist who can tune by ear can walk into any room, pick up any guitar, and make it sound beautiful in seconds. It is a foundational musicianship habit that separates casual hobbyists from serious players.
Understanding the Reference Pitch and Standard Tuning
Before we turn a single tuning peg, we need to understand the goal. Standard guitar tuning uses six notes, from the lowest-pitched string (the thickest) to the highest-pitched string (the thinnest).
The standard tuning order is EADGBE. To remember this, many beginners use the mnemonic: Eddie Ate Dynamite, Good Bye Eddie.
String 6 (Thickest): Low E
String 5: A
String 4: D
String 3: G
String 2: B
String 1 (Thinnest): High E
To tune a guitar by ear, you must establish a reference pitch. This is a known, accurate note that you use to tune your first string.
Finding a Reference Pitch
If you are playing completely alone, you can pick any string (usually the low E or the A string), assume it is close enough, and tune the rest of the guitar to it. This is pure relative tuning.
However, if you want to play along with a recording or another musician, your guitar needs to match the standard Western musical scale. This scale is calibrated to a reference note A440, where the note A above middle C vibrates at exactly 440 Hz.
You can find a reference pitch using several everyday sources:
- Another instrument: A piano, a keyboard, or another guitar that is already in tune.
- A tuning fork: A classic metal fork (usually tuned to A440) that you strike and hold near the guitar body.
- A dial tone: In many countries, a landline telephone dial tone is a combination of 350 Hz and 440 Hz, which can give you a rough reference for your A string.
- An online source: You can play a single reference tone from a website or use a digital tool like the Chords.me Guitar Tuner to get your first string perfectly set before tuning the rest by ear.
How to Tune a Guitar by Ear Using the 5th Fret Method
The most famous and widely used manual tuning technique is the 5th fret method. It relies on a simple musical fact: on a standard guitar, pressing down on the 5th fret of one string produces the exact same pitch as the next open string directly below it.
There is one major exception to this rule, which we will cover below. But first, let us look at how this relationship works across the fretboard.
What is the 5th Fret Trick for Tuning?
The 5th fret trick is a systematic way of matching unison strings. By fretting a string at a specific position, you create a pitch that should sound identical to the adjacent higher string. If the two notes do not match, you adjust the tuning peg of the open string until they do.
Here is the step-by-step process to tune your guitar using this method.
Step 1: Tune the 5th String (A) to the 6th String (Low E)
We will assume your 6th string (Low E) is already in tune, either because you tuned it to an external reference pitch or because you are using it as your starting baseline.
- Use your index finger to press down on the 5th fret of the 6th string (Low E). This note is an A.
- Pluck this fretted 6th string, and let it ring out.
- Immediately pluck the open 5th string (A).
- Listen closely to the two notes. They should sound identical.
- If the open 5th string sounds lower than the fretted 6th string, turn the 5th string's tuning peg counterclockwise to tighten the string and raise the pitch.
- If the open 5th string sounds higher, loosen the peg to lower the pitch.
- Adjust until the two sounds merge into a single, smooth tone.
Step 2: Tune the 4th String (D) to the 5th String (A)
Now that your 5th string is in tune, you will use it as your new reference point to tune the 4th string.
- Press down on the 5th fret of the 5th string (A). This note is a D.
- Pluck the fretted 5th string.
- Pluck the open 4th string (D).
- Compare the pitches.
- Adjust the tuning peg of the 4th string until the open string matches the pitch of the fretted 5th string.
Step 3: Tune the 3rd String (G) to the 4th String (D)
Next, we use the newly tuned 4th string to tune the 3rd string.
- Press down on the 5th fret of the 4th string (D). This note is a G.
- Pluck the fretted 4th string.
- Pluck the open 3rd string (G).
- Listen for any discrepancy in pitch.
- Turn the tuning peg of the 3rd string until the two notes are in perfect unison.
Step 4: Tune the 2nd String (B) to the 3rd String (G) (The Exception!)
This is where many beginners get confused. The guitar is tuned in fourths, except for the interval between the 3rd and 2nd strings, which is a major third. Because of this, you must use the 4th fret instead of the 5th fret to tune the 2nd string.
- Press down on the 4th fret of the 3rd string (G). This note is a B.
- Pluck the fretted 3rd string.
- Pluck the open 2nd string (B).
- Note the difference in pitch.
- Adjust the tuning peg of the 2nd string until the open string matches the fretted 3rd string.
Step 5: Tune the 1st String (High E) to the 2nd String (B)
For the final string, we return to the 5th fret.
- Press down on the 5th fret of the 2nd string (B). This note is an E.
- Pluck the fretted 2nd string.
- Pluck the open 1st string (High E).
- Adjust the tuning peg of the 1st string until the open string matches the fretted 2nd string.
Summary Table: 5th Fret Method Reference Guide
| Fretted Reference String | Fret Position | Target Open String | Target Pitch |
|---|---|---|---|
| 6th String (Low E) | 5th Fret | 5th String (A) | A |
| 5th String (A) | 5th Fret | 4th String (D) | D |
| 4th String (D) | 5th Fret | 3rd String (G) | G |
| 3rd String (G) | 4th Fret | 2nd String (B) | B |
| 2nd String (B) | 5th Fret | 1st String (High E) | High E |
The Physics of Sound: Listening for "Beats"
When you are learning how to tune a guitar by ear using the 5th fret method, your biggest challenge is knowing when the two notes are truly identical. If you are just listening to the volume or the tone of the strings, you might get confused. Instead, you need to listen for a specific physical phenomenon known as interference beats.
When two sound waves of slightly different frequencies are played together, they interfere with one another. This interference creates a pulsing, wavy sound that rises and falls in volume. Musicians call these pulses "beats."
- Fast pulsing: If the two strings are far out of tune, you will hear a rapid, energetic wah-wah-wah-wah sound.
- Slow pulsing: As you turn the tuning peg and the pitches get closer together, the pulsing sound will slow down: wah. Wah. Wah.
- No pulsing (Unison): When the two strings are in perfect unison, the pulsing stops completely. The sound wave becomes smooth, flat, and steady.
How to use string vibration to your advantage:
Pluck both strings loudly and let them ring out together. Watch the physical vibration of the guitar body. If you feel a physical throbbing or hear that wavy sound, your strings are not in tune. Keep turning the peg slowly. When the wavy sound disappears and the two notes blend into a single, clear tone, you have achieved pitch matching.

Alternative Ear Tuning Methods
While the 5th fret method is the most common way to tune a guitar without a tuner, it is not the only option. Experienced guitarists often use other techniques to double-check their tuning or to tune more quickly.
1. Harmonics Tuning
This is a highly accurate relative tuning method that utilizes natural harmonics. Harmonics are high, bell-like tones produced by lightly touching a string directly over a fret wire without pressing it down to the fretboard.
To use the harmonics tuning method:
- Lightly touch the 6th string directly over the 5th fret (do not press down) and pluck it. You will hear a high-pitched ring.
- Lightly touch the 5th string directly over the 7th fret and pluck it.
- These two harmonics should be the exact same pitch. Listen for the "beats" and adjust the 5th string peg until the waves disappear.
- Repeat this pattern across the strings:
- 5th fret of 5th string matches 7th fret of 4th string.
- 5th fret of 4th string matches 7th fret of 3rd string.
- Because of the irregular interval between the 3rd and 2nd strings, the harmonic method becomes complicated here. Most players switch back to the 5th fret method or use octaves to tune the 2nd and 1st strings.
Harmonics tuning is excellent because it allows both strings to ring out freely, leaving both of your hands free to adjust the tuning pegs while the notes are sounding.
2. Octave Tuning
Sometimes, fretted notes can sound slightly sharp if you press down too hard, especially on guitars with high action or worn frets. Octave tuning is a great way to verify your tuning across different areas of the fretboard.
Instead of matching identical pitches, you match notes that are one octave apart:
- Pluck the open 6th string (Low E) and compare it to the 2nd fret of the 4th string (E).
- Pluck the open 5th string (A) and compare it to the 2nd fret of the 3rd string (A).
- Pluck the open 4th string (D) and compare it to the 3rd fret of the 2nd string (D).
- Pluck the open 3rd string (G) and compare it to the 3rd fret of the 1st string (G).
Your ear is naturally very good at recognizing octaves. If the octave interval sounds sour or tense, one of the strings is out of tune.
3. The Chord Check Method
Once you have finished tuning your guitar using the 5th fret method, you should always test it by playing a few full chords.
Play an open G major chord, an open C major chord, and an open E major chord.
Sometimes, because of the physical limitations of guitar intonation, a guitar can be perfectly in tune string-by-string but sound slightly off when you play chords. If your G chord sounds sweet, but your E major chord sounds slightly sour, you may need to make micro-adjustments to your G or B strings.
Practical Tips for Developing Your Tuning Ear
Tuning by ear is a physical skill, much like bending a string or playing a barre chord. It takes practice to train your brain to hear minor variations in pitch. Here are a few practical tips to help you succeed.
Always Tune Up, Never Down
This is a golden rule of guitar maintenance. When adjusting a string's pitch, you should always approach the target note from below (flat) rather than above (sharp).
If a string is too sharp, do not just loosen the peg until it sounds right. If you do, slack can get trapped in the nut slot or behind the bridge. The moment you play a hard chord, that slack will release, and the string will immediately drop out of tune.
Instead, loosen the string until it is clearly flat (lower than the target pitch), then slowly tighten the peg to tune up to the correct note. This keeps the tension even across the entire length of the string, ensuring it stays in tune longer.
Hum the Notes
If you are struggling to hear whether a string is sharp or flat, try humming the reference pitch. Your vocal cords are incredibly sensitive to pitch changes. If you hum the reference note and then try to hum the note of the string you are tuning, your throat muscles will physically tell you whether you are reaching higher or lower to make the sound.
Practice in a Quiet Room
Background noise makes ear tuning incredibly difficult, even for experienced professionals. Turn off the television, step away from noisy fans, and find a quiet space where you can hear the subtle decay of the strings and the gentle pulsing of the sound waves.
Troubleshooting Common Tuning Problems
If you are following all the steps but your guitar still sounds terrible, you might be dealing with mechanical issues rather than an untrained ear.
1. Old, Worn-Out Strings
As guitar strings age, they lose their elasticity. They accumulate dirt, sweat, and oil from your fingers, which causes them to corrode and lose mass unevenly. When this happens, the string can no longer vibrate in a uniform pattern. An old string might be in tune when played open, but sound completely out of tune when fretted at the 5th fret. If your strings are dull, discolored, or feel rough to the touch, replace them.
2. Poor Intonation
Intonation refers to how in-tune a guitar is across the entire length of the fretboard. If your guitar’s saddle is not set correctly, the strings will stretch unevenly when fretted.
To test your guitar's intonation:
- Tune your open string perfectly.
- Press down on the 12th fret of that same string.
- The fretted note at the 12th fret should be exactly one octave higher than the open string. If it is significantly sharp or flat, your guitar needs an intonation adjustment, which is best handled by a professional guitar technician or a local music shop.
3. Sticky Nut Slots
If you hear a sharp ping sound when turning your tuning pegs, your strings are getting caught in the slots of the nut (the plastic or bone piece at the top of the neck). This friction prevents the tension from distributing evenly. You can fix this by rubbing a tiny bit of graphite from a lead pencil into the nut slots the next time you change your strings. The graphite acts as a dry lubricant, allowing the strings to slide smoothly through the slots.
When to Use a Tuner vs. Tuning by Ear
Learning how to tune a guitar by ear is an essential skill, but it does not mean you should throw away your digital tools. There is a time and place for both methods.
| Scenario | Best Method | Why? |
|---|---|---|
| At home practicing | By Ear | Excellent daily ear training; builds relative pitch. |
| In a loud rehearsal space | Digital Tuner | Noise makes relative ear tuning nearly impossible. |
| On stage at a gig | Digital Tuner (Pedal) | Allows you to tune silently between songs without annoying the audience. |
| Recording in a studio | Digital Tuner | Absolute precision is required; minor pitch variations are magnified in a mix. |
| Sitting around a campfire | By Ear | No gear required; quick, organic, and convenient. |
If you are practicing at home, try tuning your guitar by ear first. Once you think you have it perfect, open up the Chords.me Guitar Tuner to verify your work. This creates a feedback loop: your ear makes the guess, and the digital tuner confirms how close you were. Over time, you will find that your manual guesses become incredibly accurate, often landing within just a few cents of perfect concert pitch.
Your learning process to Better Musicianship
Tuning a guitar by ear is more than just a mechanical chore; it is an active conversation with your instrument. Every time you pluck two strings, listen for the interference beats, and slowly turn a peg until the sound clears, you are training your brain to become more musical.
Do not get discouraged if it feels difficult at first. Your ears have muscles of their own, musically speaking, and they require exercise to grow strong. Start by trying to tune just one string by ear today. Within a few weeks of consistent practice, you will be able to pick up any six-string instrument, listen to the strings vibrate, and bring them into perfect, sweet harmony without ever looking at a screen.
Related Chords.me Guides
For the next step, read Chromatic Tuner Guitar Guide: How to Tune Accurately as a Beginner, Beginner Guitar Lessons Roadmap: Your Step-by-Step Path to Playing Songs, and CAGED System Guitar Explained: Complete Beginner’s Guide to Fretboard Mast before moving on. You can also test the same idea in another key and check each string with the guitar tuner while practicing this lesson.
Practice This With Chords.me
Use the Chord Transposer to test the idea in another key, then practice the same example slowly. Focus on clean notes and steady timing before increasing speed.
Frequently Asked Questions
Is it hard to tune a guitar by ear?
Tuning by ear can be challenging initially, but it is a learnable skill. Consistent practice will improve your ability to discern pitch differences and make the process easier over time.
What note do you tune the low E string to when tuning by ear?
In standard tuning, the low E string is tuned to E2, around 82.41 Hz. When tuning by ear, you can either match it to an external E reference or use it as your starting reference and tune the other strings relative to it. How can I train my ear to tune a guitar?
You can train your ear by practicing relative tuning, focusing on matching the pitch of adjacent strings. Regularly comparing notes and listening for harmonic resonance will develop your aural skills.
How do you tune a guitar without a tuner?
You can tune a guitar without a tuner using relative tuning methods, such as the 5th fret trick. This involves using one string's note to tune the adjacent string until they sound harmonious together.
What is the 5th fret trick for tuning a guitar?
The 5th fret trick is a relative tuning method where you fret a note on one string at the 5th fret and tune the next higher string to match that pitch. For example, the note at the 5th fret of the low E string is A, which you then match to the open A string.
Why is ear tuning important for guitarists?
Ear tuning is important because it develops your relative pitch, enhances your listening skills, and connects you to the physical properties of your instrument. It also fosters self-reliance, allowing you to tune any guitar in any situation.
About the Contributor
Chords.me Tuning & Setup Desk Tuning, strings, and setup contributor
A brand contributor profile for Chords.me tuning and setup content. This desk focuses on tuning accuracy, string choice, fret buzz, intonation, action, and maintenance topics for everyday players. Content is checked for practical clarity, beginner readability, and accurate links to relevant Chords.me tools.